In my last post “Perspective for the Urban Sketcher:Sighting” I shared a technique for drawing in perspective. With some of the feedback I received from
that post, I was reminded of a related, yet different technique that can be
used with sighting. Sighting can also be
used to gauge size and proportions. In
this post, I will build upon the sighting technique and show you how to draw
architecture, simplifying an elevation down to large, simple shapes and using architectural features as measuring devises.
If you've ever spent time observing architecture, you've probably noticed that there are almost always some degree of pattern and relationships between different shapes and masses. Whether they are windows, doors, columns, arches, roofs etc... they are all sized and proportioned in relationship to one another and to the building as a whole. An urban sketcher can use different elements of a building as tools to his/her advantage, especially when sighting.
When sketching architecture, size and proportions are dependent on your distance from and relative position to your subject. So, before getting to the steps, the following rule must be followed in order for this technique to work:
Remember, once you decide where to sit and sketch, you must stay in the same spot until you have at least marked out all sizes and proportions. (Once you move, your distance and relative position to the subject changes, and your sighting approximations will be inconsistent).
Sighting Size and Proportions: Step by Step
1) Take a few minutes to observe the building, pointing out some of the major shapes, structural features or patterns. When sighting for size and proportion, you will draw your building starting with the larger masses of the building, moving down to the smallest masses and details last.
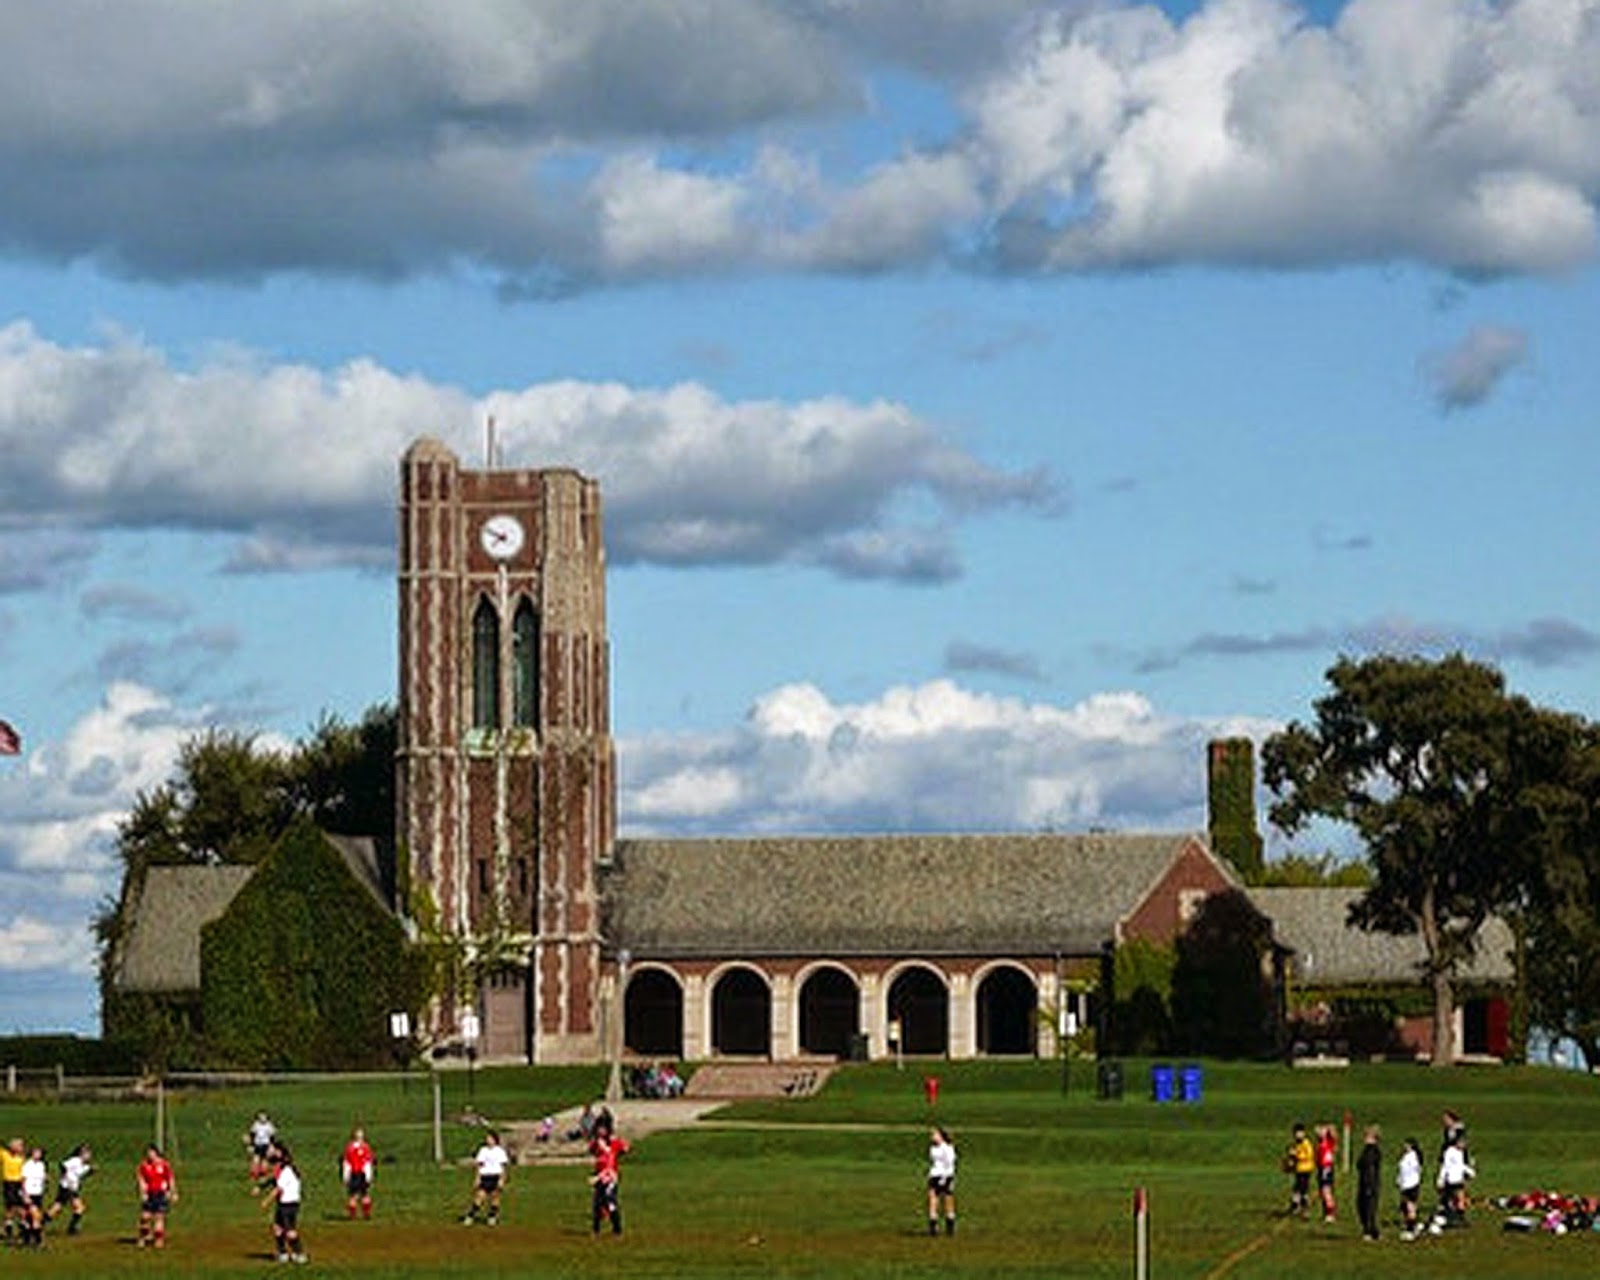
2) Chose one feature of the building to use as a measuring unit. I chose the width of the tower. With your sighting tool (pencil, wooden skewer etc…), fully extend your arm out, placing it in front of the architectural feature. (It helps to close one eye and squint). Move your thumb along your sighting tool until it reaches the edge of the architectural feature, essentially measuring the feature’s width. This will become the measuring unit for the majority of the sighting. So, all measurements will be in X number of tower widths.
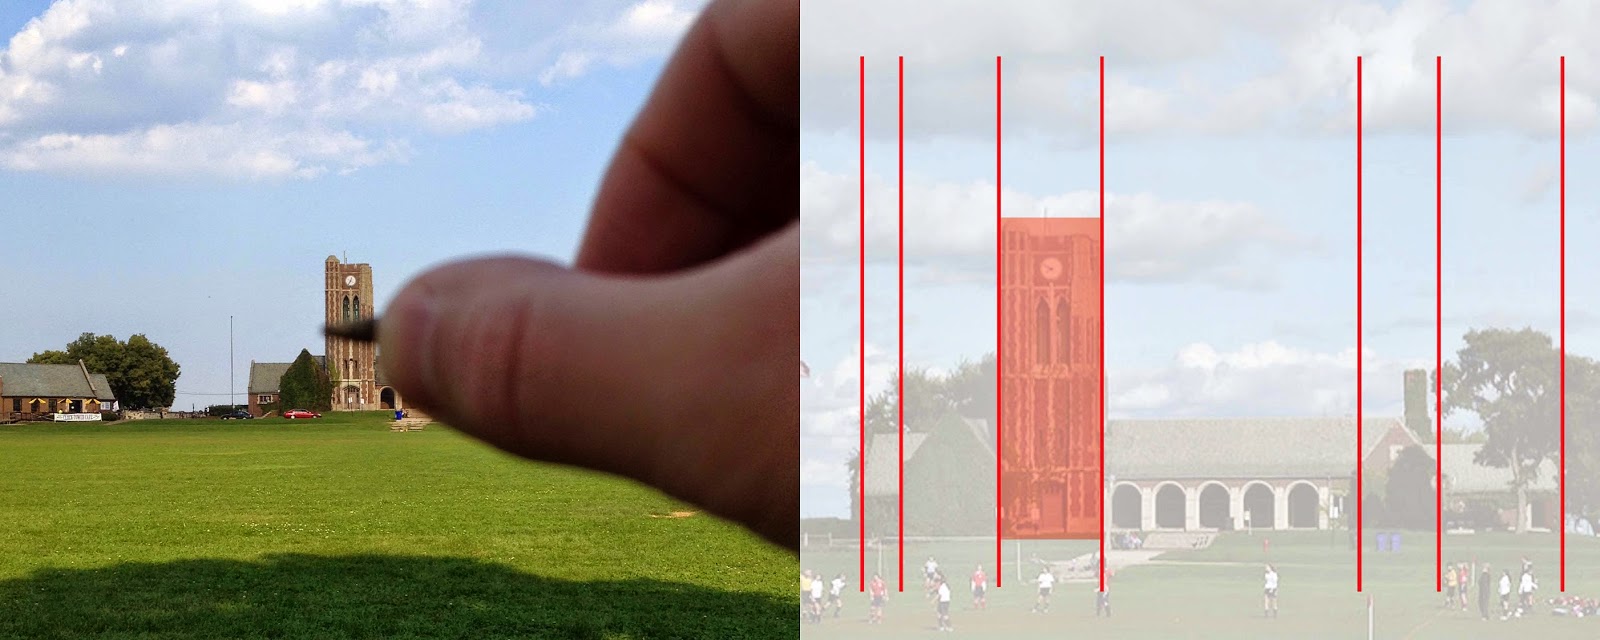
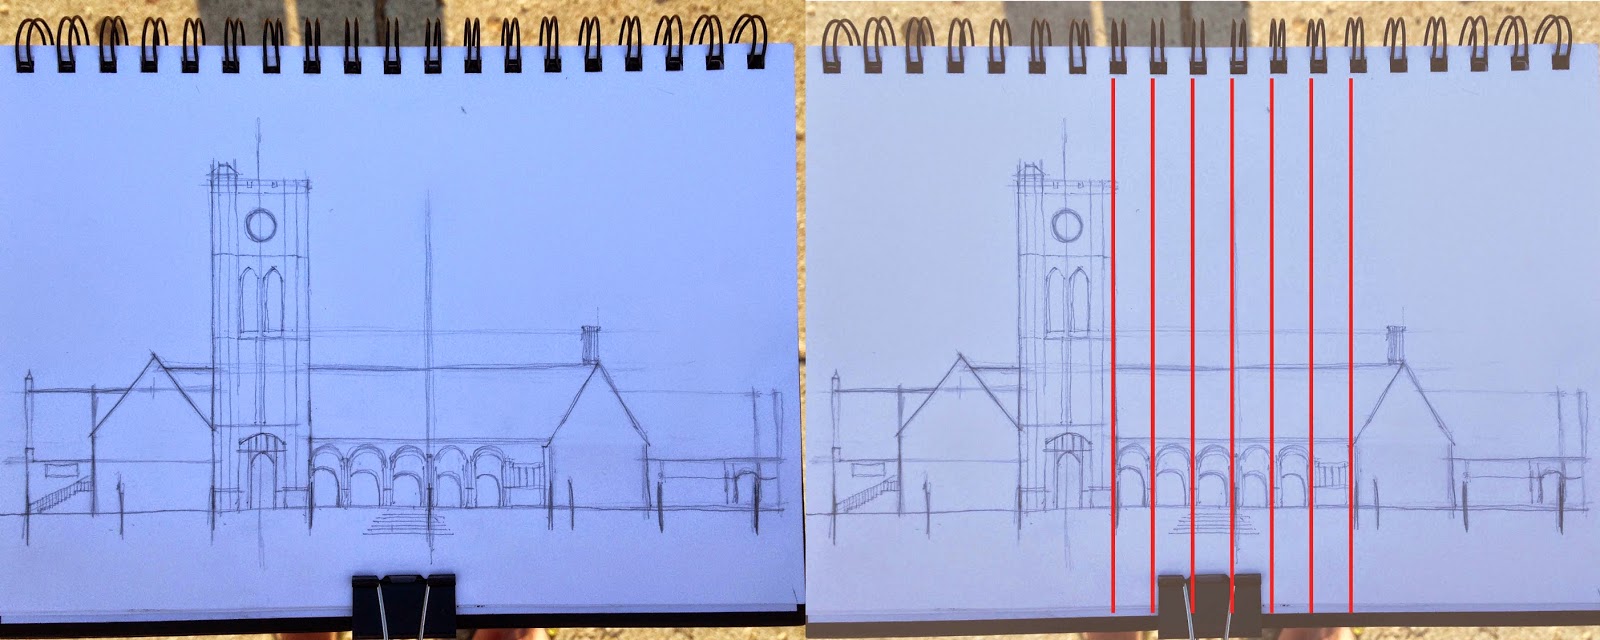
3) Measure the width and height of the building. The length of this building was about 8 tower width’s wide. The tower was 3.5 tower widths tall, and the roof heights changed at different locations, but ranged from 1.5-2 tower widths tall. Use tick marks and guidelines to help visualize your measurements. Here I marked out the overall length of the building at slightly more than 8 widths. Use guidelines for all of your measurement. You will begin to see how different parts of the building relate to one another.


4) Mark out all the other large masses. In this building there were essentially 6 large masses that comprised the entire elevation. I sized each portion based on my measuring unit, the tower width.
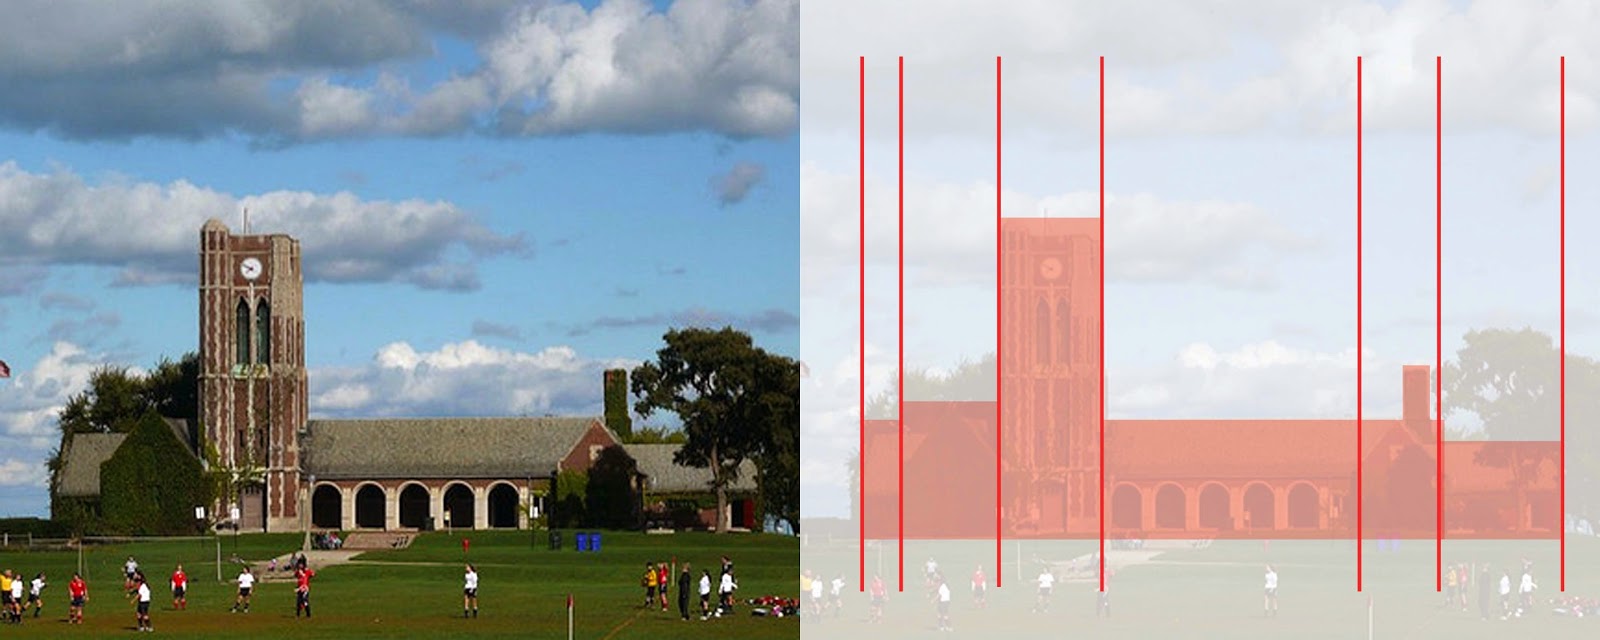
The 8 tick marks I made on the length of the building helped as guidelines. So for example, I sighted that the first mass (farthest left) was about ¾ of 1 tower width. Since I have the tower width marked out, I was able to draw my vertical line for that portion of the wall at ¾ of the way through the first tick mark. Repeat these steps for the rest of the masses.
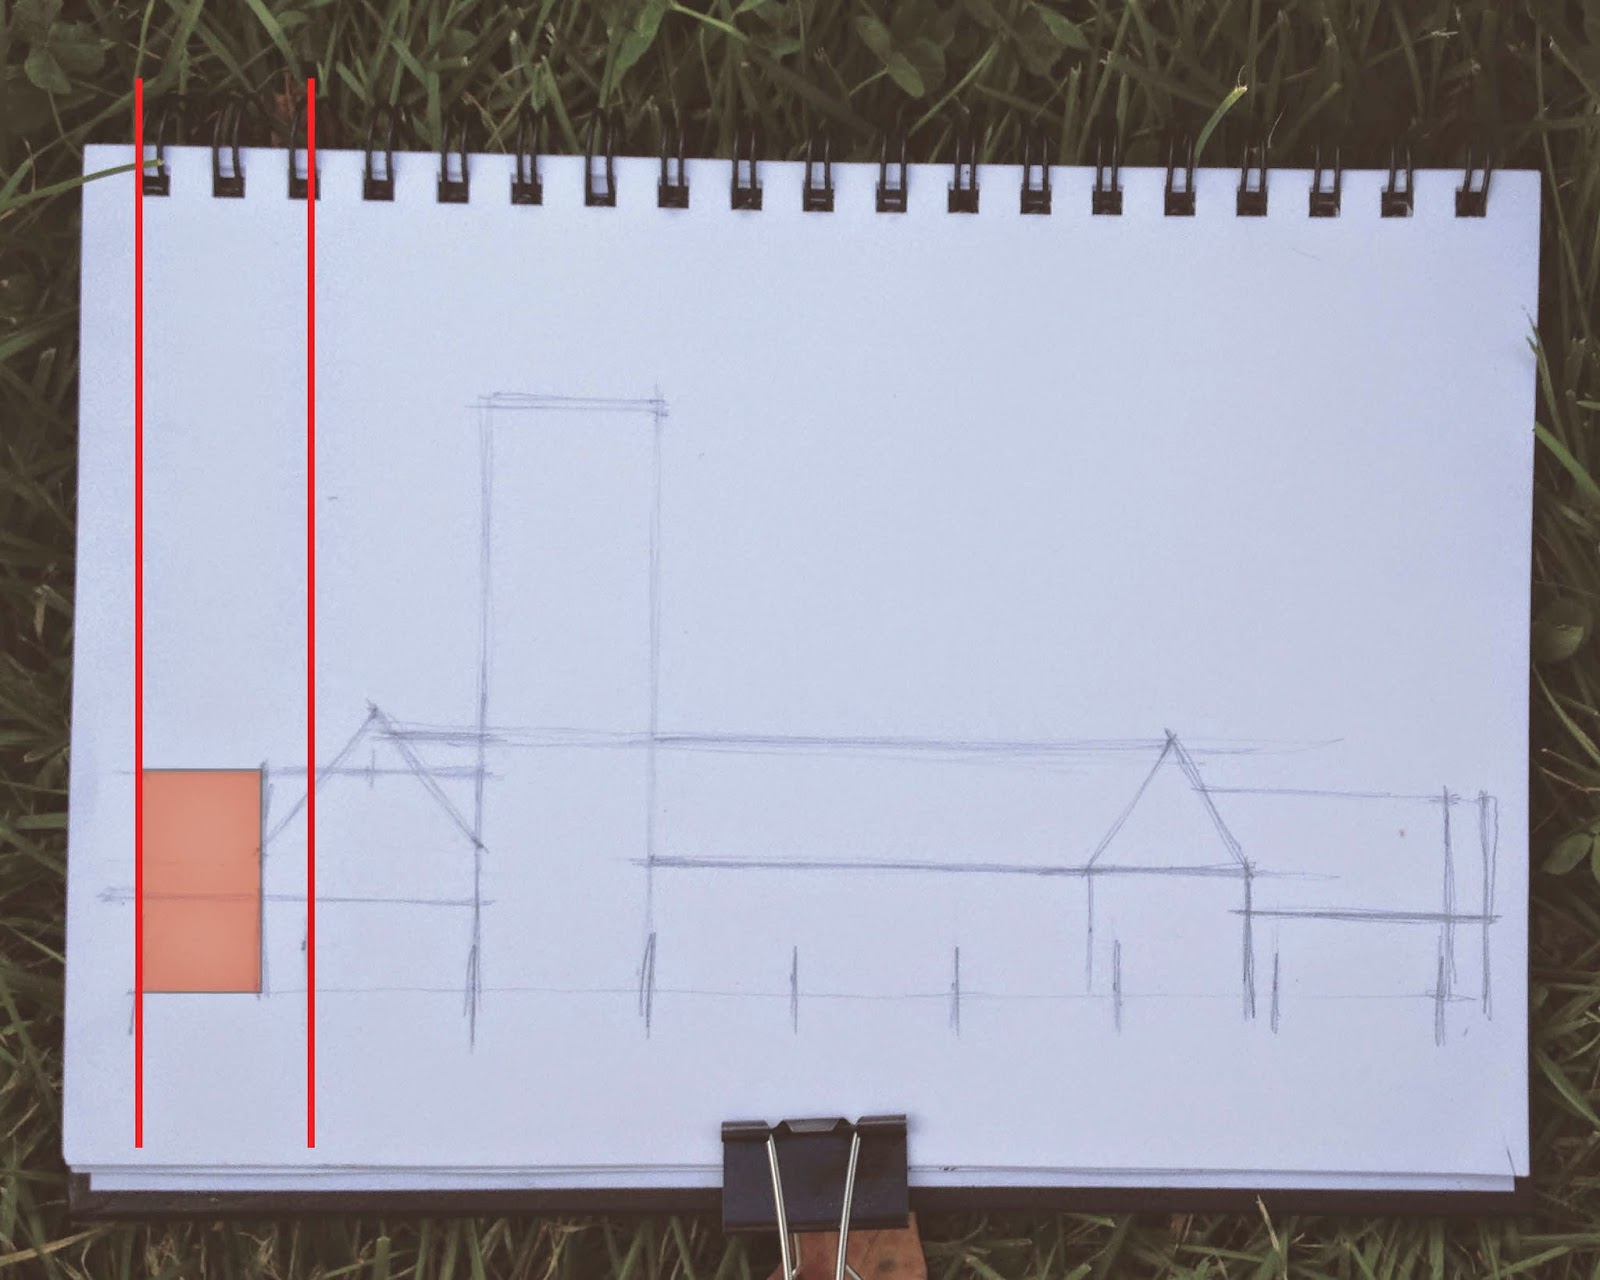
5) Now that you've marked out the largest masses of the building, move to the medium sized masses. For me these were the arches, windows and doors. The colonnade of arches is nicely divided into 6 uniform bays, so I was easily able to divide the middle portion of the building up into 6 equal parts. Use this type of logic for the rest of the details. (If your details are not evenly spaced, simply use a smaller architectural element as your measuring unit to determine the distances and proportions you need.)
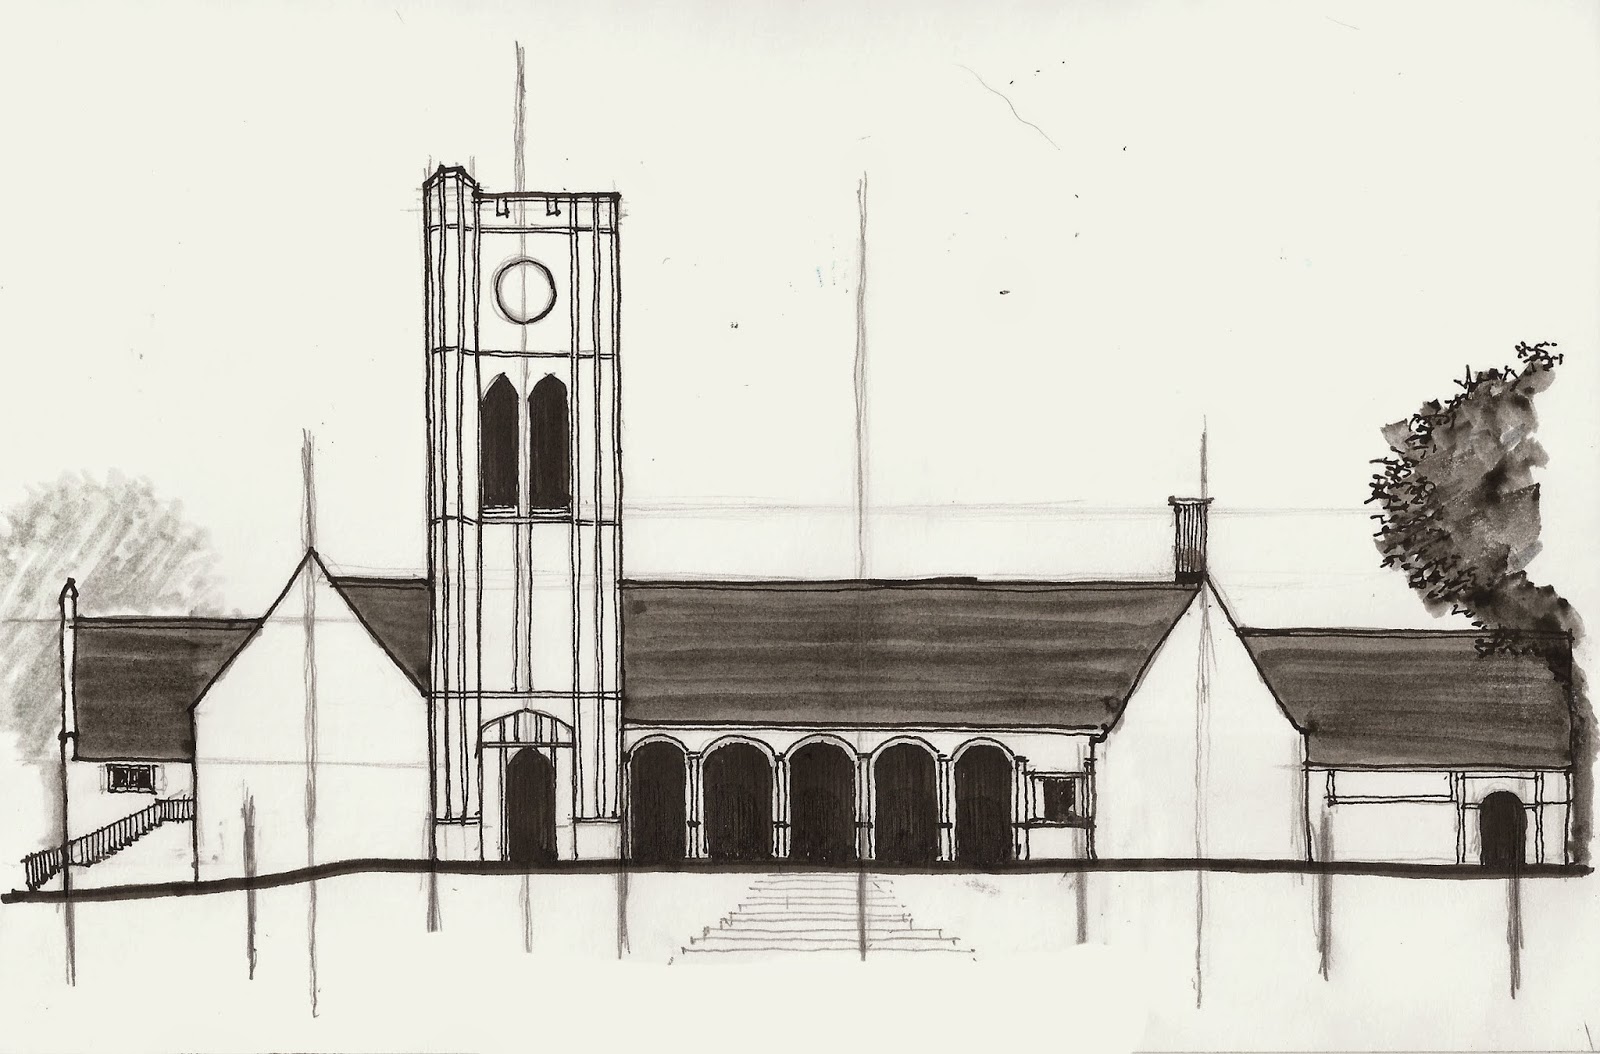
Now you can begin to add details, value, shading and shadows.
Once you feel comfortable sighting sizes and proportions on a building at a straightforward view, you will be ready to combine the techniques of perspective with those in this post.
I hope this is helpful! As always, let me know if you have any questions!
-Andrew

Great post Andrew! Sighting is such an important technique. One that can be used no matter what the subject.
ReplyDeleteThank-you Barbara! That's a good point, these tips on sighting are not limited to Architecture at all. You can sight anything
ReplyDeleteGreat post Andrew, well done. I have already told you about how I use the sizing stick to calculate a full body human but your post today reminded me of how we used to use grids to map out a scene. We would draw a small grid onto a piece of cellophane, look through it and then transfer what we saw onto our page which had a proportionate sized grid pencilled out on the page. That system seems fraught with errors compared to your system of just taking measurements and transferring those to the page. Love that little sizing stick.
ReplyDeleteThanks Wes. I did similar type exercises in school as you mentioned with the cellophane. We didn't use any cellophane but worked with the grids and essentially copied an image, usually a portrait, square by square, focusing on the range of values. I also picked up sighting while earning my degree as well, but sighting is a much more useful thing to know. One of those lessons that will stick with me for ever.
DeleteInsightful information shared. One can also get the admission in architecture in maharashtra only at SMMCA Nagpur. Thanks for sharing.
ReplyDelete