Pages

Showing posts with label TTT. Show all posts

Tuesday, December 1, 2015

Ditch Your Eraser

USk Chicago: Tuesday Tips & Tricks by Ted Gordon

What’s the fastest way to improve your drawing?
Ditch your eraser.

How can I get a decent image of my pencil sketch online?
While you are at it, ditch your pencil; draw in ink.

GOING ERASERLESS:
The more you do something, the better you get at it. When you are studying what something looks like and practicing rendering it, you are improving your drawing ability. When you are erasing those marks, you are practicing erasing, not drawing. Don’t worry about stray marks, just keep drawing.

Another way I like to put this:
Everyone has thousands of terrible drawings in them. The sooner you get them out, the better. Erasing will only slow you down.
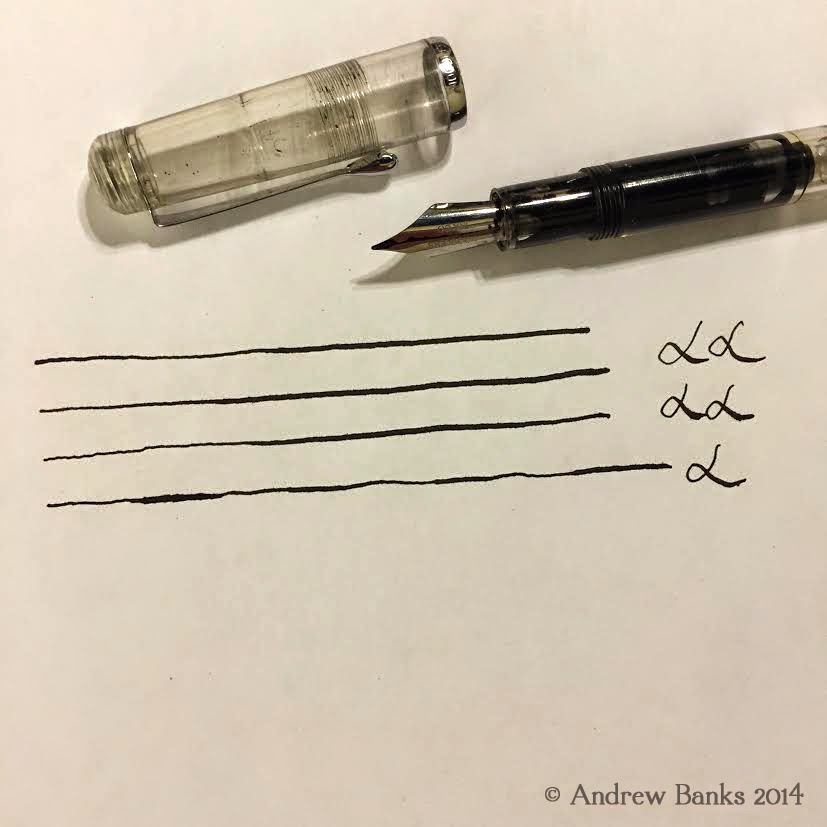
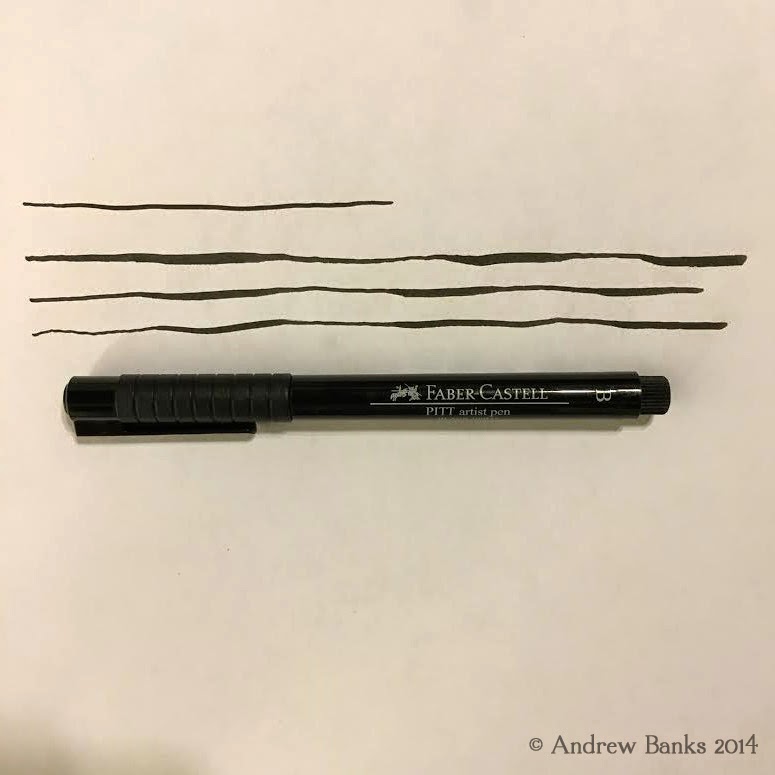
INK:
Committing to eraser-free drawing is easier, if you draw with something difficult to erase.

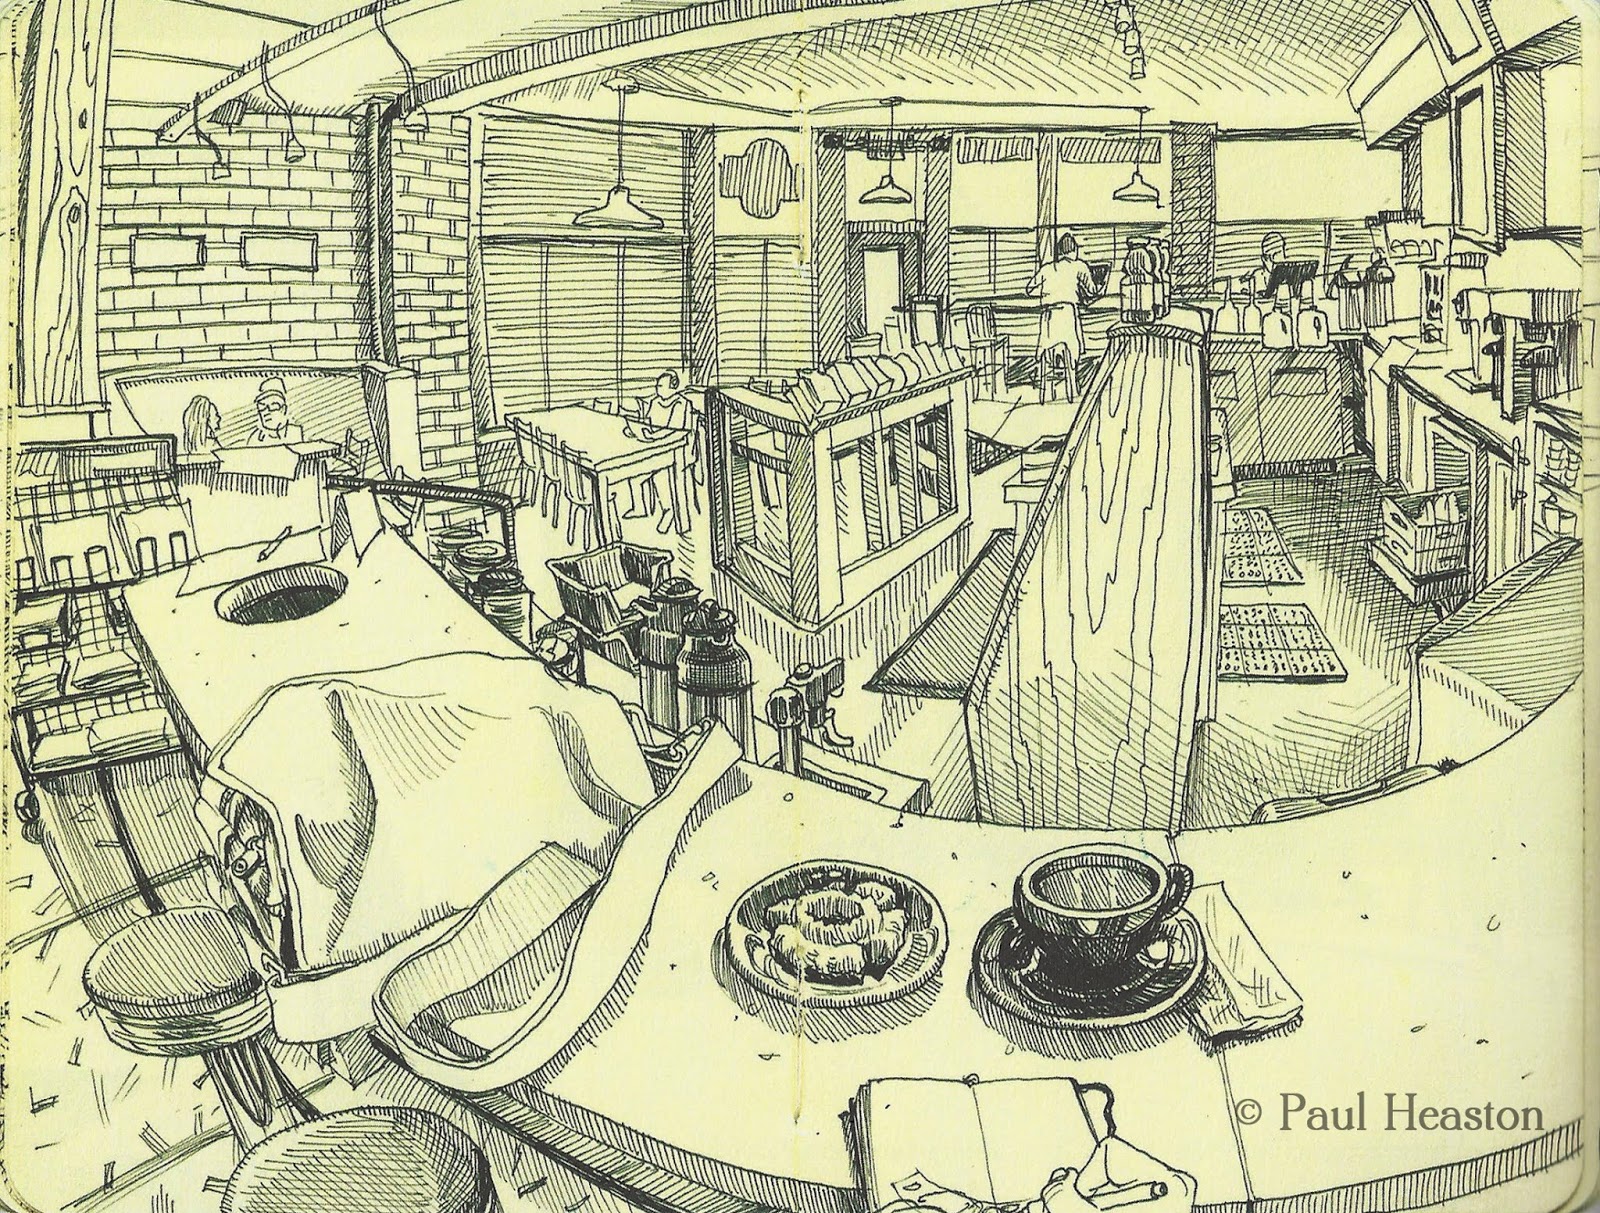
A huge benefit of drawing in ink is that it photographs well! You don’t have to sharpen an ink drawing, adjust its contrast or do anything! If you do, it handles those adjustments much more simply and clearly than a graphite drawing.

Create cleaner drawings. Ink, compared to graphite, stays where it’s put and doesn't need fixative applied to make that happen. It’s less likely to smudge and, depending on which ink you use, can be more or less waterproof.

Draw with Confidence!
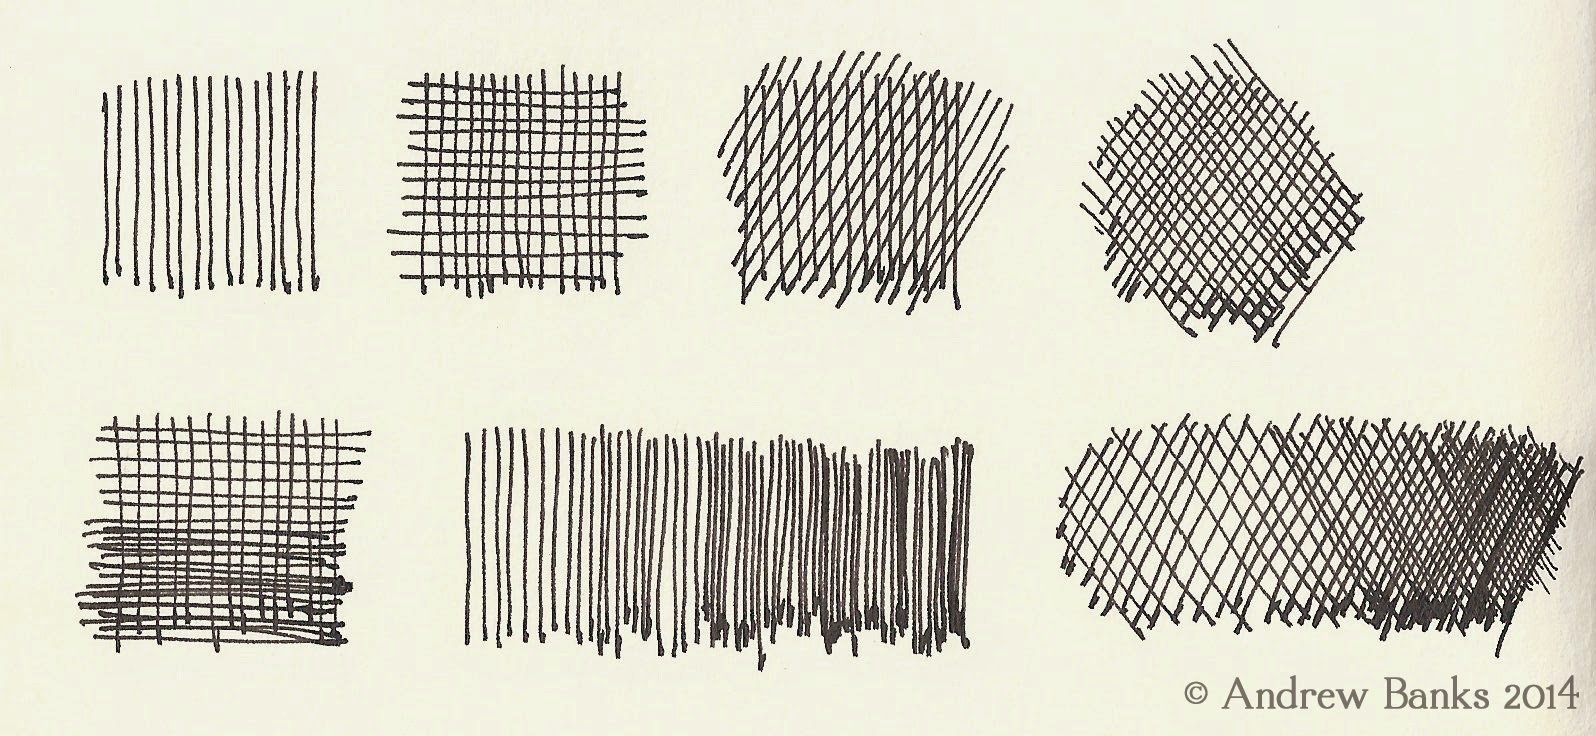
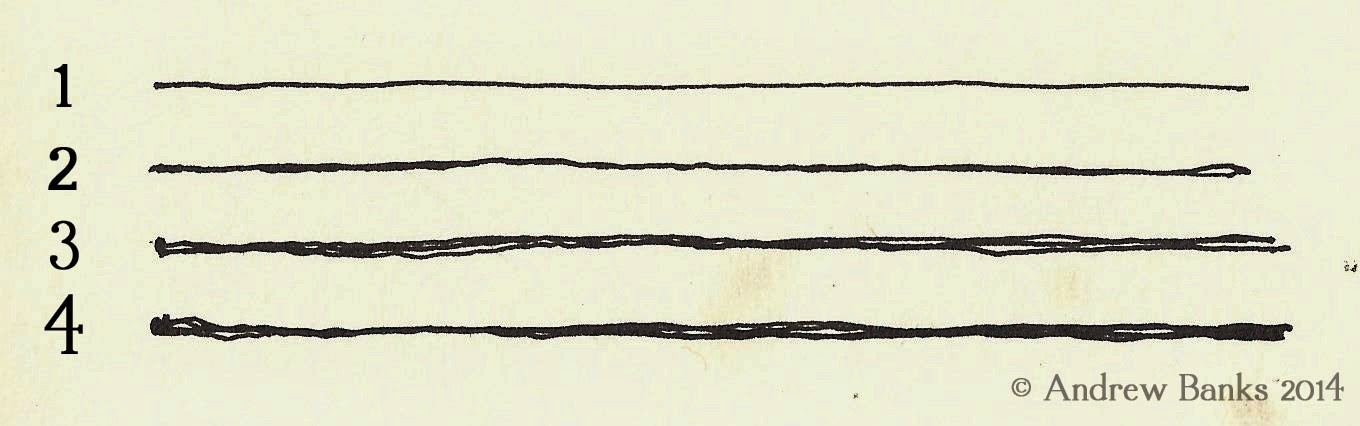
If you are nervous about abandoning your eraser, you may be surprised how drawing with ink can make your marks more bold - in more ways than one.
Using a pen encourages you to be more deliberate. That creates a cleaner, more elegant line, in my opinion.
Conversely, if that ‘tightens you up’, go nuts. Put all those lines down there. As long as you are looking and drawing, you are improving.

CONCLUSION
In conclusion, I highly recommend drawing without your eraser, if you haven’t. You’ll notice that many Urban Sketchers are drawing in ink already. My recommendation comes from the advice of greater artists that have preceded us as well as my own experience, seeing this improve my drawing and the drawings of my students.

You can see my Urban Sketches and Plein Air Paintings here: http://www.tedgordonart.com/ http://instagram.com/motionimpossible

What do you think? Have you experimented with leaving your eraser out of the picture? What other reasons do you like to draw without your eraser, or in ink?

Tuesday, October 27, 2015

How Urban Sketching and Plein Air Painting Compare and Contrast

TUESDAY TIPS & TRICKS, by Ted Gordon


How are the Urban Sketchers and Plein Air Painting movements related?

As an artist with a hand in both and with our upcoming combined show, the Urban Sketchers Chicago Holiday Showcase, with Featured Guests, Plein Air Painters of Chicago 11/21-12/13/2015, let’s examine similarities and differences.


HISTORY
Technology had something to do with the formation of both. Plein Air means "in the open air" or simply, “outdoors.” The technological advance of paint in tubes allowed artists in the mid 1800s to explore nature and capture the effects of sunlight in the moment. Urban Sketchers is about drawing on location, in a supportive, global community. The internet was key to its formation and is integral to the global sharing aspect.


Plein Air: Elephant Vigil at Showmen's Rest, A Plein Air painting in a limited palette of Richeson casein
SIMILARITIES
Both groups create images on location, in the moment.
With some exceptions, the size of our drawings and paintings tend to be small, for reasons of both portability and time.
We travel with our materials. Watermedia (watercolor, gouache, and casein) and digital tools are used in either. Of all of these, watercolor is the most popular crossover medium in my experience.
We’re both interested in capturing the Truth of a place and time, exploring the world around us.


Fountain of the Muses, Rio De Janeiro, in Winsor & Newton watercolor
DIFFERENCES
There are exceptions to all of these items, however, in general, the differences tend to be about time and materials. Plein Air Painting tends to take much more time per image and is painted with paint or pastels. Urban Sketches can be created in much less time and may use any material.


Urban Sketches tend to be even smaller than a typical plein air painting. When you consider that an Urban Sketch might be drawn on a pocket-sized sketchbook while waiting in line, as opposed to being created on an easel set up for several hours, you can understand why.


Urban Sketches, without question, can also be drawn indoors. Cafes, museums, and concert venues are all typical Urban Sketchers venues. Exceptions prove how similar these efforts are. In both Plein Air Painting and Urban Sketchers, the world is our studio.


Based in its journalistic roots, Urban Sketchers aims to tell the story of our surroundings. Urban Sketches are far more likely to contain text within the work than in a Plein Air painting.
The story of a Plein Air painting can be much less literally narrative. For instance, the story could be about what the sunlight is doing during your painting or how intensely blue that boat is.


Plein Air is almost always done on an easel. Urban Sketching sometimes is, but often isn’t, for mobility and quickness.


While Plein Air paintings are made with paint or pastels, Urban Sketchers draw with any kind of media and wildly individual styles. Plein Air styles, while they can be quite varied, aren’t as divergent as the Urban Sketchers styles can be, in my opinion.


Urban Sketchers tends to be more casual, mobile, and quick. Urban Sketchers’ subjects are more likely to have a person or an action as the subject. In contrast, plein air paintings often take much more time to complete and are more likely to contain natural environmental or architectural subjects.


Plein Air painters are more likely to edit an environment for aesthetic purposes. A tree might move or wires might be omitted without feeling that the truth of the place had been compromised in plein air.


Lindberg Park, painted in Winsor & Newton watercolor on location. Are these Plein Air or Urban Sketches? Yes!

CONCLUSION
In conclusion, I think that some of the differences are superficial, while others are very strong. Which you are doing at a given time may have more to do with your equipment and intention than anything else. There are definitely times when the lines are blurred. To be clear, I don't make a value judgement between the two and there's no reason you can't do each in the same day.
For artists that like to experiment, I encourage you to try both!


You can see more of my work, Urban Sketches and Plein Air Paintings here:

What do you think? In what other ways are Urban Sketchers and Plein Air Painting similar or different?

Tuesday, December 16, 2014

Creating Value with Line

Tuesday Tips & Tricks

I've enjoyed being able to contribute to the TTT series so far.  It’s challenged me to think about why and how I do what I do when I am sketching and to put it all down into words.  This is something I have never really done until recently.  It has also been incredibly beneficial to read the weekly posts of the other contributors Wes, Barbara and Alex.  In the last couple months, as Chicago winter has settled in and limited outdoor sketching opportunities, I've found myself coming back to bits and pieces of advice from several previous posts from Alex and Barbara.  In Playing With Line, Barbara reminded us of the versatility and simplicity of line.  In Thoughts on Talent, Alex reminded us the more we work on something the better we become, and that all of us can become great sketchers.  And most recently in Every Visual Creative Should Keep a Sketchbook Barbara gave pointers on how to use a sketchbook, turning it into a personal habit and practice, something we carry with us everywhere.  With these tips in the back of my mind, and knowing how the winter months can put my sketching into hibernation, I started thinking about how to encourage myself to maintain the sketching habit in spite of the inclement weather conditions.  So, (at least for the time being), I decided to trim down my entire sketch kit to one or two fountain pens and one sketchbook.

Simplifying my entire sketch kit down to two or three pieces has made it easy me to carry my sketchbook and pen(s) with me wherever I go, which has also encouraged me to sketch more.  More importantly, (and to the point of this post) I've been learning how versatile one sketching tool can really be.  This post goes over some of the techniques I have been playing with in the past few months that allow simple line drawings, with one pen (or whatever you chose to use), to be transformed from flat, valueless sketches into dynamic value filled sketches.

Creating Value With Line

Why? 
Line drawings that do not incorporate value can often seen flat and static.  Drawings that incorporate value have a sense of depth and are more dynamic.

How? 
-Use different sized pens (pencils, brushes, markers etc etc)  For the purpose of the post I am focusing on and using pens as an example.  You only need one or two.  There are several different brands of pens that come with a variety of sizes.  Some popular choices are the Sakura Pigma Micron pens, Staedtler’s Pigment Liner pens, or Faber Castell’s PITT Artist Pens.  Or you could use a fountain pen that has a flexible, springy nib, such as Noodlers Konrad Flex Pen.  My preference is to use one or two fountain pens.  If only using one, I use my TWSBI580 with an EF (Extra Fine) nib.  The extra fine nib is great for creating really thin lines, but the flow of the ink in the pen is fast enough that I can easily add value to a line(s) or easily fill in larger areas with value.  If using a second pen, I will use one that has an M (medium) or B (bold) nib.  Having a second pen with a larger line weight provides a quick contrast in line weights which can be used for things such as the profile or relief of a building, objects that are in the foreground or any line or object you want to pop from the rest of the drawing.


-Cross hatching.  Cross hatching can be done in many different  ways and patterns.  Cross hatching allows you to build value up through the layering of marks.  Hatching can be done by layering lines that are all going in the same direction, or lines that are going in different directions (diagonal, perpendicular etc etc…)  The Urban Sketcher Paul Heaston is renown for his cross hatching.  (Check out more of his work on his Facebook Page) Here is one example of how he uses cross hatching to create value in his line drawings.


Here are a few simple cross hatching examples:


Multiple Pass – This is a name I made up.  Maybe there is another name for this, but the idea is that the more times you go over the same line, the more value, and thickness it will have.


Line variation – When using a pen such as a flex pen, brush pen or felt tipped pen, and with varying amounts of force, you can create variety of value in your lines. 


Line Weight - Check out the unique ways that Illustrator Lyndon Hayes uses line weights to achieve value with line.


Lastly, here are a few of my most recent sketches, each completed with one pen, that demonstrate creating value with line:


As soon as I narrowed down my every day sketch kit to a single pen and started re-visiting basic sketching skills as these, I became reacquainted with basic sketching styles I had started to overlook. These basic techniques, all completed with one or two pens, can produce some real impressive work. So my challenge for you is to keep it simple, and keep on sketching this Chicago winter season.

Happy Holidays and a Happy New Year!


Tuesday, October 28, 2014

Graded Wash in Watercolor

Tuesday Tips and Tricks

Watercolor is a great tool for urban sketching.  In this post, I will show you a technique I use frequently in both urban sketching and my professional work.

Watercolor is a delicate media and can be frustrating to work with if you do not have some basic steps to work with.  Graded washes are a helpful skill to know when wanting to capture light, shade and shadow.  In nature, light rarely hits a surface as a flat tone.  Factors such as the orientation of the subject, the context of the subject and the direction from which the light is coming from all impact how light appears on the subject. 

Here is a step by step process for creating a smooth, graded wash with watercolor, followed by a few practical applications for graded washes:

Creating the Graded Wash:


1)
Hold your sketchbook or paper at an angle to allow the watercolor to flow down the paper.  About a 35 degree angle works well for me.  If the angle is too high, the water will drip too fast for you to control.  If the angle is too low, the paint will not move fast enough, could cause unwanted buckling of the paper and will not allow for a smooth wash.

2) Load brush with completely clear water.  Apply clear wash to paper, creating a bead, allowing the water to gather slightly.  (If your angle is just right, the water will stay where you guide it.)  Make sure there is an even amount of water in all parts of the bead.


3)
  Load your brush with a highly diluted watercolor wash and introduce it into the clear wash before it has time to soak into the paper and dry.  With downward brush strokes, pull the bead of paint down the page.  You will begin to see the pigment from your brush get pulled into the clear wash.


4)
Load your brush with a slightly more pigmented wash and introduce it into your bead, continuing to pull it down the page.  (Work on doing this quickly.  If you allow the bead to dry, you will be left with a line of color that will interrupt the graded wash).


5)
Load your brush with the highest pigmented wash and continue to pull the bead downward.


6) Bring your bead to your desired edge or location.  Shake the brush off of or touch the brush to a paper towel to absorb the excess water.  Gently touch your dry brush to the bead.  Your brush will absorb the excess water back into the brush, leaving an even surface of paint on the paper.  If we left the bead of water on the paper, the excess paint would diffuse back up into the earlier wash and would create an unwanted stain.


7) Repeat steps 2-6 until you get the values you want.

Graded Wash Applications:
Here are just a few examples of applications for graded washes

Shadows
Here, the graded wash works perfectly for a shadow cast on the underside of an awning.  On a sunny day, light will reflect off of the ground surface back on the building wall.  The graded wash allows you to show this reflected light gradually darkening as it gets farther from the ground and up under the awning.


Curved objects
Curved objects have a range of tones (highlight, mid tone, shadow, reflected light, cast shadow) that can be achieved with graded wash.

Skies
Depending on where the sun is in the sky, the sky will have a graded wash.  For example when the sun is low on the horizon, the graded wash will be light on the horizon line and darker the higher you go into the sky.  When the sun is higher in the sky it is generally the opposite.

Monday, September 22, 2014

Please, Have A Seat

One of the many benefits of attending an Urban Sketchers Sketch Crawl is discovering the many different ideas and workarounds that other members have developed for their particular way of sketching. Case in point: where does one sit when sketching “on location?”

The obvious answer is often “find someplace to sit and sketch what is in front of you.” This simple solution may present you with such options as a park bench, café tables, the half walls of a landscaping terrace, sidewalk curbs, a sturdy fence, a tree stump, a fire hydrant (good luck with that one), a pier or boat dock, a plastic 5 gallon bucket and the back seat of your convertible car (weather permitting, of course). It makes the most sense since most urban sketchers operate by the motto “travel light” and would prefer not to carry any extra weight.

When presented with an unknown setting, however, an experienced urban sketcher likes to come prepared. This can mean providing seating arrangements of their own to insure there is a place to sit. Therefore, I have assembled a collection of seating options which I have gathered from other savvy sketchers and perhaps you will find one that meets “The Four C’s of Sketch Chairs: Comfort, Convenience, Compartments and Cost.”

Comfort: Sketching can often take an hour or two so you want a seat that will support you without having to sit too low or cut off your circulation during that time.

Convenience: Ideally you will want a seat that will fold up to fit inside of your backpack, art bag, or large purse if you are able. Sometimes there is a trade-off for a seat that is both comfortable and convenient, so you try to find the best of both.

Compartments: Having a chair that provides some kind of storage to hold the art supplies you will be using is especially handy if the ground around you is either wet or gooey-dirty. Who wants to set their supplies in the mud and then pick it up again to use on their sketch? Pockets, zipper pouches, and cup holders are all welcome additions to a comfortable chair.

Cost: Assuming that you do not have an endless cash flow and do not possess the crafting skills to make your own perfect chair, then cost may be important for you to consider as one of the determining factors.


Many of the following chairs can be found in an assortment of outdoor, sporting goods and garden shops in addition to art supplies stores. Here then are some of the more popular personal, portable, sketch chair options and where you can find them. Find one that you like and please join us at one of our next Urban Sketchers' Chicago Sketch Crawls. Happy shopping.


Tuesday, August 5, 2014

Tuesday Tips & Tricks: "Framing a Sketch"

Framing a Sketch
   
Have you ever made a sketch that you felt was missing something or was unfinished?  Couldn't figure out exactly what it needed?   A well thought through sketch can mean many different things depending on who you are talking to, but for me, one of the most important factors of a beautiful, well composed sketch is how it is framed.  I’m not talking about ripping your sketch out of your sketchbook, taking it to Michael's, having it matted, thrown in a frame and calling it done (although many of your sketches deserve to be framed), because that would be too easy and this post would be a waste of your time.

So what do I mean by framing a sketch?  Here are a few bullet points on what framing a sketch is, followed by just a few of my favorite examples and techniques:

Framing a sketch:   
  1. is to compose or arrange the subject of your sketch in a way that draws attention to the most important part of your sketch
  2. is the ability to draw your viewers eyes to what you want them to see
  3. is putting your sketch in a position to be resolved, and finished compositionally
  4. can be done not only for long, involved sketches, but ALSO for quick, on the go sketches
Examples:
Here a few of my favorite framing techniques:

Isolation:
Pick one object out of a particular scene and draw it so that it can stand alone and still look complete. Instead of capturing everything you see, just pick one object.  Here I drew the Villa Rotunda, and centered it on the page.  In order to suggest what it’s surrounding looks like, to resolve the sketch, and to give the building something to visually rest on, I drew a wavy line that very quickly begins to suggest where it is.  The line centers the building within everything that is drawn, and makes the building the focal point.
© Andrew Banks 2014

Incorporate the Subject:
This might be one of the most popular techniques.  Use your subject to your advantage.  Transform the subject into the framing device for your sketch.  Here I used two obvious options, a window and a door. Everything fits inside the openings and the frame becomes part of the sketch. 

© Andrew Banks 2014


© Andrew Banks 2014
Fading:
Fade out the edges of the sketch by using less pigmented paint, less cross hatching, less shading etc...  The detail will be concentrated in the center while the faded out edges focuses the attention where you want it to be .

© Andrew Banks 2014


Architecture:
Use architecture and architectural features such as walls, arches, colonnades, columns and even windows to frame your sketch.

The buildings on the left and right rise up on each side of the picture plane, framing the busy street scene.  © Allan B. Jacobs 2014


This column and arch is the focus of the sketch as well as a framing device for the background content of the sketch.
© Andrew Banks 2014

Landscape:
Compose the subject in a way that allows natural or built landscape features to frame the subject. Some popular and effective landscape features are trees, tree trunks, tree canopies, bushes, large plants and flowers, leaves, and street furniture (planters, benches etc...)

The tree canopy curves over the top of the entire sketch.  Combined with it's strong, dark value, it works as a strong framing device. © Allan B. Jacobs 2014
Value/ Contrast / Line weights:
Differences in value, contrasts, and line weights are perfect framing tools.  Use objects with more value or thicker/stronger line weights along the perimeters and in foregrounds of your sketches.  Lighter values and line weights will recede to the background, allowing your framing devices to be that much more evident.


Buildings in foreground, on left and right have stronger line weights than those in the background.
© Andrew Banks 2014


The contrast in value and drawing technique of the trees from the rest of the drawing emphasize them as framing devises. © Andrew Banks 2014
Literal Frame:
This is the least creative of the options, yet an option nonetheless.  Draw a literal box around your sketch. Make sure your drawing fills up the box and that parts of the sketch come into contact with the box.
© Andrew Banks 2014

A fun twist on the literal box is to break the box up and allow the subject to overflow out of it.  Here, the dropped out silhouettes of the people on the bottom become part of the continuous line border of the sketch.

© Andrew Banks 2014


I hope you find these tips to be helpful!  Feel free to comment with any questions or any of your own framing techniques!

-Andrew