Pages

Showing posts with label urbansketch. Show all posts

Saturday, March 26, 2016

Spotlight Sunday - Dave Wittekind

Spotlight Sunday is series of interviews designed to introduce and highlight Chicago Urban Sketchers individually.  Now that our chapter has reached nearly 500 members it has become more of a challenge to meet every single member in person and have a meaningful conversation.  These posts concentrate on individuals and speak in their own words.


Dave Wittekind

Interviewed by Andrew Banks


For this week's Spotlight Sunday, I had the opportunity of interviewing Chicago based illustrator Dave Wittekind.  I have always been big fan of Dave's work and have a special appreciation for his really great line work and really smart use of toned papers.  Thanks again for answering my questions, Dave! It's my pleasure to help share a little more about you and your work with our group:


Hi Dave, thanks so much for taking the time to chat. 
I always enjoy seeing your sketches posted to our Facebook group.


ANDREW:  How did you first hear about the Urban Sketchers community and what made you decide to join Urban Sketching Chicago?

DAVE: Thanks very much for asking me to be a part of this series, Andrew.  I first heard of Urban Sketchers, I believe, through Twitter, though it may have been another city’s chapter. I was so happy to discover that Chicago had a chapter that met monthly.  My first meetup was the water taxi outing two years ago, and from there I was hooked.  I look forward to every outing.


ANDREW:  The water taxi event was a lot of fun.  One of the reasons I like our group is that you end up visiting places (and in this case, taking a different modes of transportation) you may not have normally gone to had it not been for the group.  I believe that is the first time we met as well.Did you sketch before finding USk Chicago?  If so, when did you start sketching?

DAVE: Previous to the USk Chicago meetups, I did very little sketching on my own, which I’m not proud of.  I still need to get into the regular habit of sketching in between meetups, though I am getting better at it.  I’ve always done preliminary sketches for my illustration work and would occasionally sketch people on the L or in airports, but very little outdoor or architectural sketching.  During the Occupy movement, I would sometimes go downtown and sketch the people there.

ANDREW: As a professional illustrator, does urban sketching play a role in your day to day job?  If so, how does it help you?

DAVE: Urban sketching has definitely helped my sense of observation and sharpens my fundamental skills.  Sketching also gives me a sense of connecting to a tradition that goes back centuries.  Also as a freelance illustrator, it’s nice to get out of the studio and interact with other artists.  I’ve met such great friends at USk outings!   

ANDREW: I have the same experience, working from home myself.  It's always inspiring to get together with our group, with so many people who have the same passion for art and sketching as I do.  I've also met some great friends along the way too!

I really appreciate the line work in this sketch.  The lines are very deliberate, yet loose and highly descriptive all at the same time.  I see this technique in much of your work.  Can you talk about this style and how you developed it?  Does it tie into a particular background or training you have had?


DAVE:
Thanks, Andrew!  My dad was always into drawing, especially political cartooning, and he encouraged my early interest in drawing. Then there was Mad Magazine, which I devoured and introduced me to the work of caricaturists like Mort Drucker and Jack Davis.
Later, at the American Academy of  Art in Chicago, I had the late Eugene Hall as a life drawing instructor.  His enthusiasm and energetic drawing style was a big influence.
After graduation, I worked as a storyboard artist at Foote, Cone, & Belding ad agency, where we needed to further develop a quick, expressive style to convey action & emotion with just a few lines.

ANDREW:  Is there a specific subject matter you are particularly drawn to or inspired to sketch?

­
DAVE: My two dogs are always a great source of inspiration (and they never complain if I make their noses too big).  I’ve always been more comfortable drawing organic things like people, animals, and foliage as opposed to man made structures.  That’s why I’m so impressed with the work that you and others post of buildings and architectural details.  I’m hoping to get more comfortable in that area.

ANDREW:  What is your favorite medium to sketch with?

DAVE: Though my illustration work for the most part is created digitally, it always starts with a series of preliminary sketches, usually with pencil or Sharpie.  My USk sketches to this point have been done using Sharpie or Tombow brush markers on toned paper with white conté highlights.  I’ve added occasional watercolor washes too.
  

ANDREW: Are there any Urban Sketchers who inspire your own work?

DAVE: I can honestly say that everyone at USk inspires me.  It’s such a pleasure to see such a great variety of styles and medium.  I also occasionally go online and do Twitter searches for #sketchbook and #urbanSketch.  It’s astounding to me how much incredible work is being done on a daily basis.  I also recently read New York artist Molly Crabapple’s memoir “Drawing Blood”.  I like the way she uses her sketches to inspire activism.

ANDREW: If you had to narrow your sketch kit down to your three favorite sketching tools, which would you choose?

DAVE: In the previous interview, Fred Polito said that he’d like to expand his tool set, though his watercolors are so masterful, I can see why he’s tempted to stick with them.  I feel the same way about exploring additional tools, rather than getting too comfortable with a routine.  Still, if I HAD to limit it to three, I guess I’d have to go with toned paper, Tombows and white conté.

ANDREW:  Fair enough!  I threw you a curve ball there, but I can't help but agree that it's also tempting to try different media on occasion.  I think it comes naturally to creative types.

ANDREW:  Do you have any websites, blogs or social media accounts where people can see more of your work?

DAVE:  I have two sites. One, at http://davesink.com is my personal Illustration website and blog, and another website run by myself and a partner, at http://dipstickstudio.com, features graphic recording and whiteboard videos.

Thanks again Andrew. I really appreciate  all the work you and the rest of the USk Chicago organizers do for the group!

ANDREW:
Thanks for your time Dave!


Tuesday, March 3, 2015

Lessons From Your Own Sketchbooks

Tuesday Tips & Tricks


With only 17 days until spring, there is light at the end of this wintry tunnel, and before you know it you will be able to sketch this incredible city outdoors again.  Every year around this time, I start getting antsy for the upcoming spring and summer months. After being cooped up and restricted by the subzero temperatures, short days and lake effect snow I am ready to get back outside and fill up new sketchbooks.  I am sure all of the Chicago sketchers can relate.  For those of you who have the privilege of sketching in a warm climate all year round, this may enlighten you to the struggles of a Chicago sketcher in the winter:

You might be a Chicago sketcher if....
  • You have sketched the view from your living room window this winter more times than you can remember.
  • You look out this same window hoping something new to sketch magically appears so you can satisfy your sketching needs.
  • you have had to out-sketch mother nature freezing the ink in your pens or watercolor pallets
  • you have put on more than three layers of clothing just to stay warm on a sketch outing
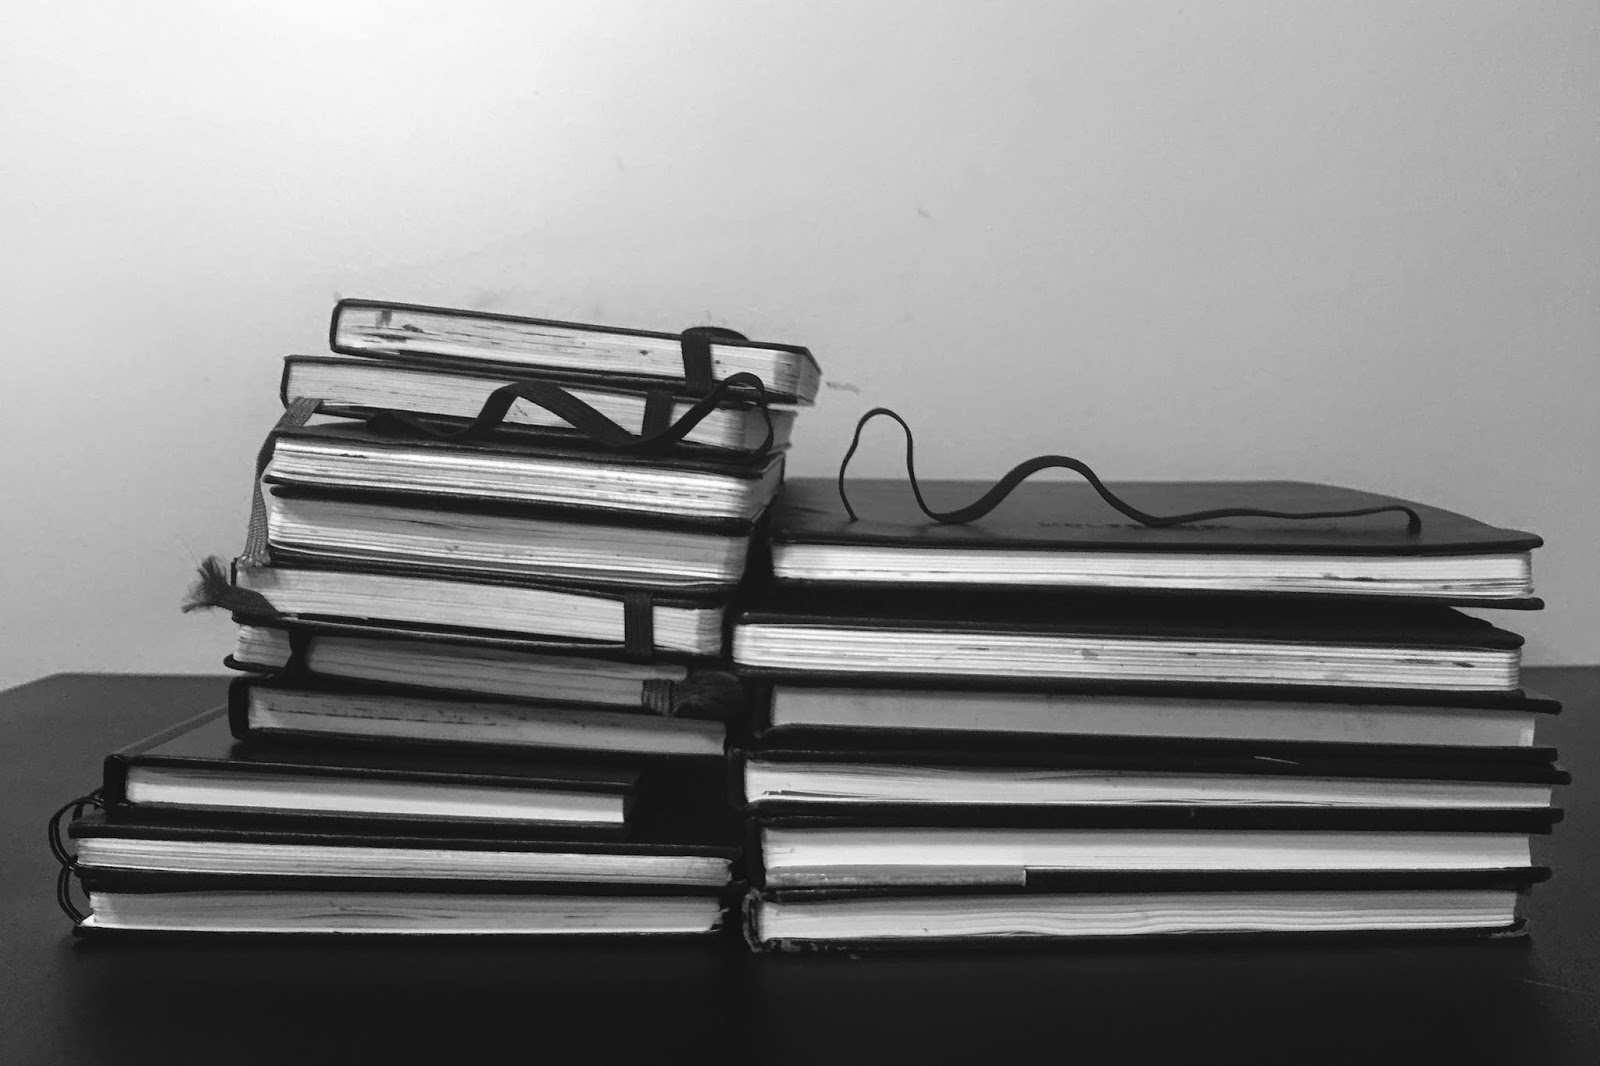
  • you have spent hours flipping through sketching blogs, galleries, books and old sketchbooks in anticipation for warmer weather and more sketching opportunities....
If you have been thinking about urban sketching  more than actually sketching lately, you have also likely thought about your personal sketching style and at some point wondered how you could develop it, improve it or take it in a different direction.  I know I have, and as I recently flipped through my collection of sketchbooks I was reminded of how incredibly valuable our own sketchbooks are as teaching tools.  So much of urban sketching is about experimentation, trial and error, process and spontaneity.  Whether you realize it or not, each sketch you create is a compilation of countless artistic decisions.  These decisions shape your sketching style and express the way you see the world around you on paper.

Every once in a while it is well worth our time to look back at old sketchbooks to see where our sketching journey began, what artistic thoughts were running through our mind, what types of media we were experimenting with, and which techniques worked and which didn't.  Did you take notes about some valuable insight you discovered in the process of creating a particular sketch?  The nature of urban sketching is so spontaneous that we often move onto the next sketch, forgetting all about the sparks of genius that happened in our past sketches.  There are so many opportunities for us to learn from and build upon our own work.  Taking a look at our past sketches is a great way to see how much we have grown, to be reminded of where our creative process was at different stages of our lives and how it has evolved.  

So, while we wait through the rest of what Chicago winter has to throw as us, my challenge for you is to dig up the very first sketchbook you ever kept and flip through it.  


Go through the rest of your sketchbooks until you get to your current sketchbook (or most recent sketches).  What are your gut reactions?  You will be reminded of all of the great work you have already done, all of of the places you have seen, and all of the techniques you have tested.  Here are some more questions to ask yourself while doing this.  I hope these will start turning some wheels about how much you can learn from your own sketchbooks:
  • What kind of things did I sketch?  Do I need to add variety to my choice of subject matter?
    • Have I challenged myself by choosing subject matter that is out of my comfort zone?
  • What different types of media have I tried?  
    • What have I learned about my favorite pens, paints, markers etc...and how they react to different types of paper?
  • What kinds of improvements do I see in my technique and how can I continue to build upon this?
    • Which artists or sketchers influenced my work early on, and who influences my work now?
  • What are 2-3 techniques I have always wanted to learn more about, but still have never gotten around to trying?
I hope that those questions begin to allow your sketchbooks to teach you.  Remember not to be too hard on yourself.  We can often be our own worst critics.  If you are looking to pick up some new sketching skills, USk Chicago will be hosting it's second annual Sketching Seminar in July.  More details about this will be on their way in the near future...

Best,
Andrew Banks


Tuesday, September 30, 2014

Drawing Architecture: Sighting Size and Proportion

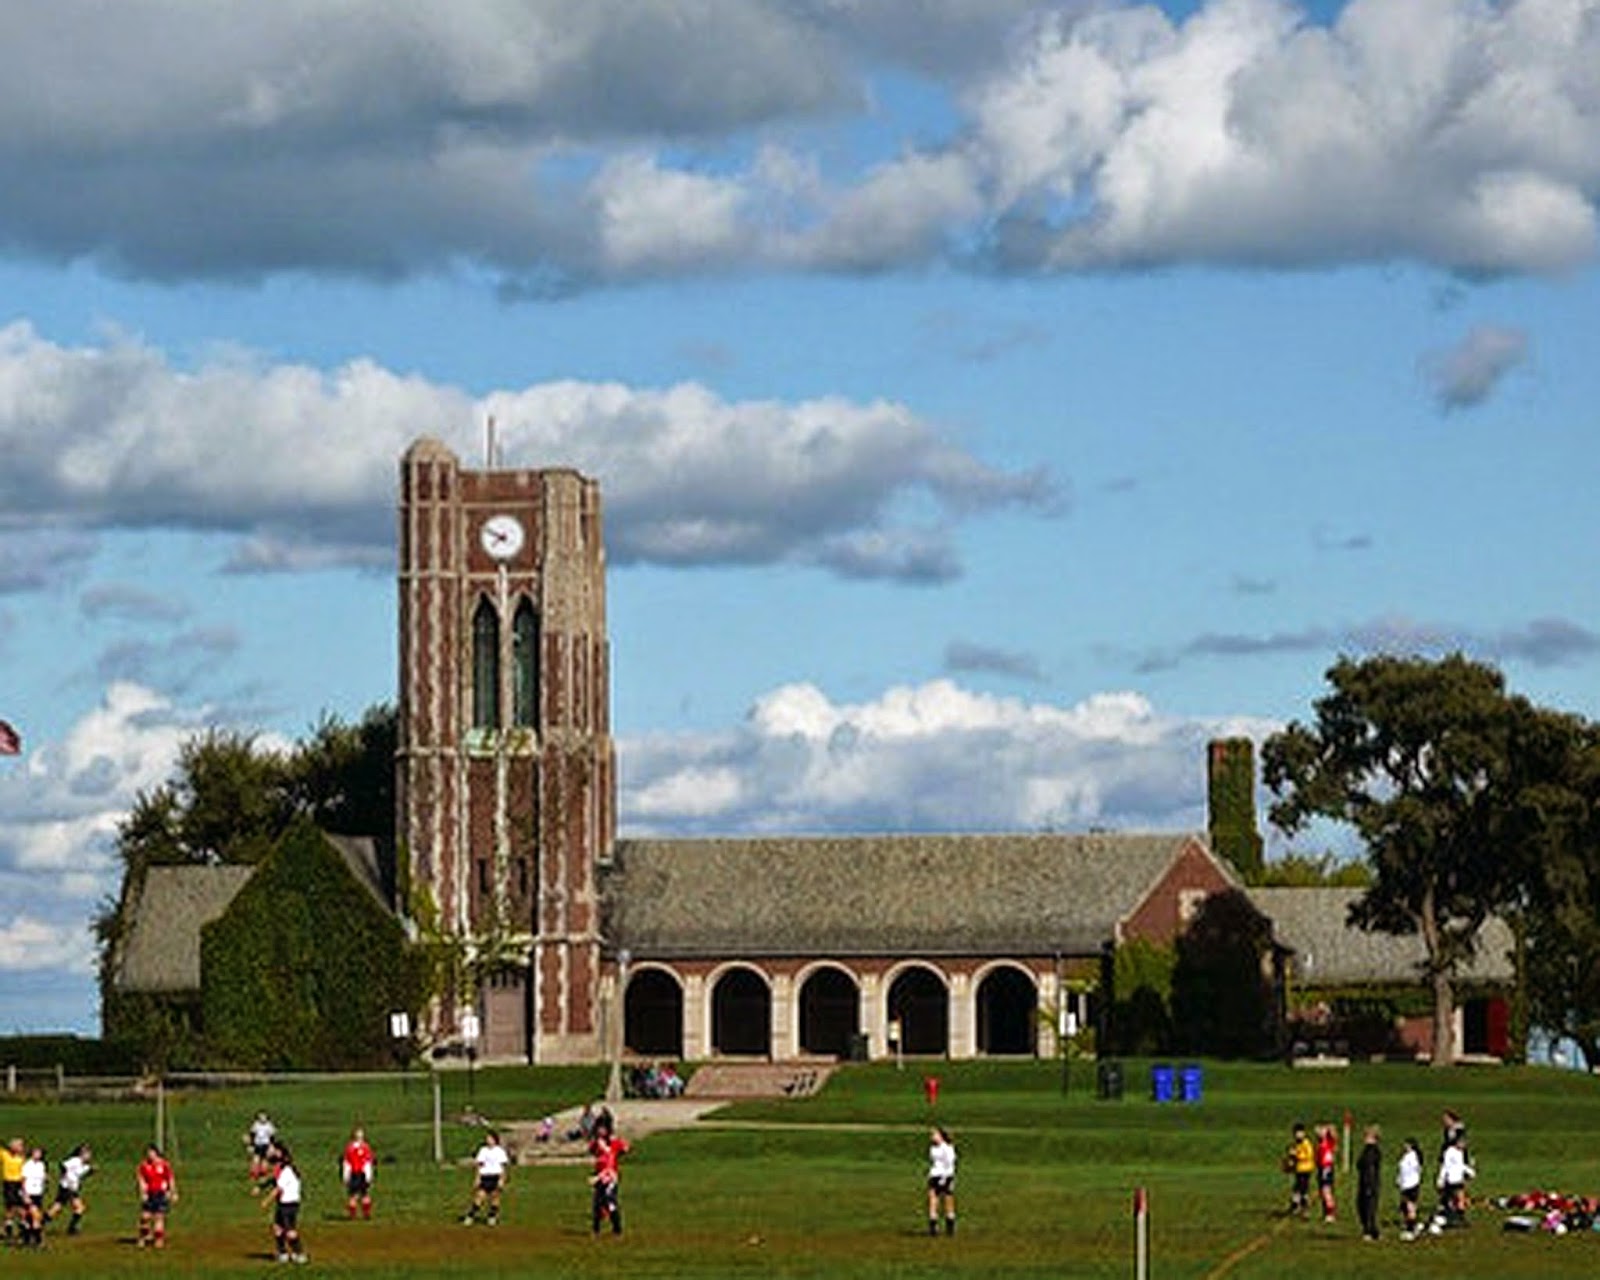
In my last post “Perspective for the Urban Sketcher:Sighting” I shared a technique for drawing in perspective.  With some of the feedback I received from that post, I was reminded of a related, yet different technique that can be used with sighting.  Sighting can also be used to gauge size and proportions.  In this post, I will build upon the sighting technique and show you how to draw architecture, simplifying an elevation down to large, simple shapes and using architectural features as measuring devises.

If you've ever spent time observing architecture, you've probably noticed that there are almost always some degree of pattern and relationships between different shapes and masses.  Whether they are windows, doors, columns, arches, roofs etc... they are all sized and proportioned in relationship to one another and to the building as a whole.  An urban sketcher can use different elements of a building as tools to his/her advantage, especially when sighting.

When sketching architecture, size and proportions are dependent on your distance from and relative position to your subject.  So, before getting to the steps, the following rule must be followed in order for this technique to work:

Remember, once you decide where to sit and sketch, you must stay in the same spot until you have at least marked out all sizes and proportions.  (Once you move, your distance and relative position to the subject changes, and your sighting approximations will be inconsistent).

Sighting Size and Proportions: Step by Step

1) Take a few minutes to observe the building, pointing out some of the major shapes, structural features or patterns.  When sighting for size and proportion, you will draw your building starting with the larger masses of the building, moving down to the smallest masses and details last.


2)
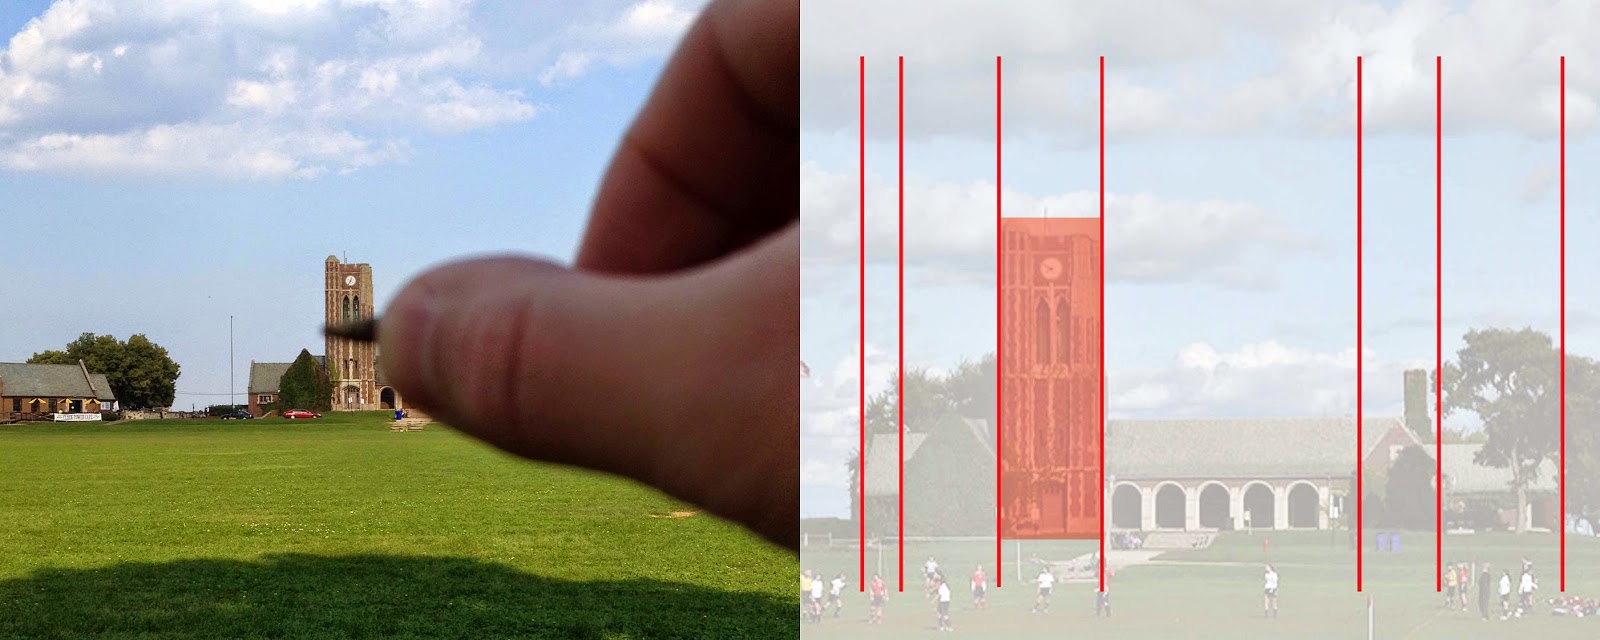
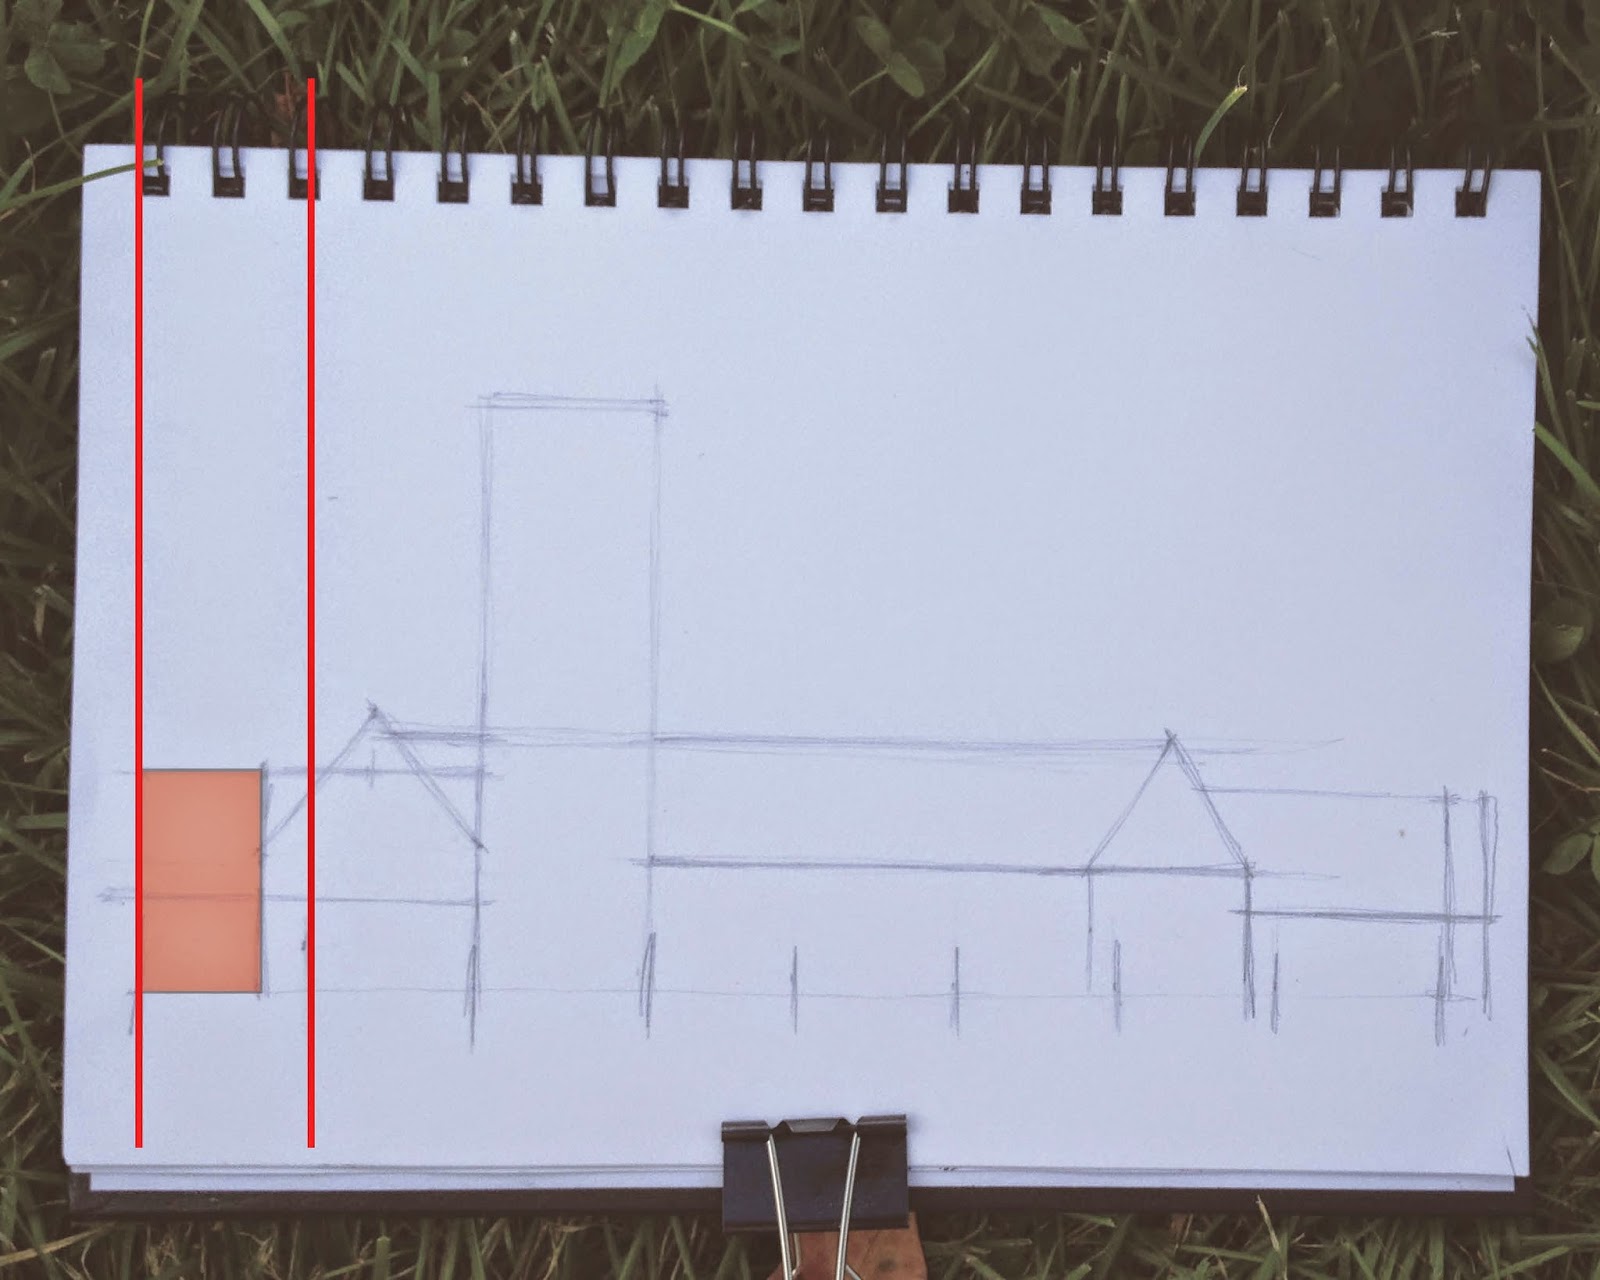
Chose one feature of the building to use as a measuring unit.  I chose the width of the tower.  With your sighting tool (pencil, wooden skewer etc…), fully extend your arm out, placing it in front of the architectural feature.  (It helps to close one eye and squint).  Move your thumb along your sighting tool until it reaches the edge of the architectural feature, essentially measuring the feature’s width.  This will become the measuring unit for the majority of the sighting.  So, all measurements will be in X number of tower widths.


3) 
Measure the width and height of the building.  The length of this building was about 8 tower width’s wide.  The tower was 3.5 tower widths tall, and the roof heights changed at different locations, but ranged from 1.5-2 tower widths tall.  Use tick marks and guidelines to help visualize your measurements.  Here I marked out the overall length of the building at slightly more than 8 widths.  Use guidelines for all of your measurement.  You will begin to see how different parts of the building relate to one another.


 4)
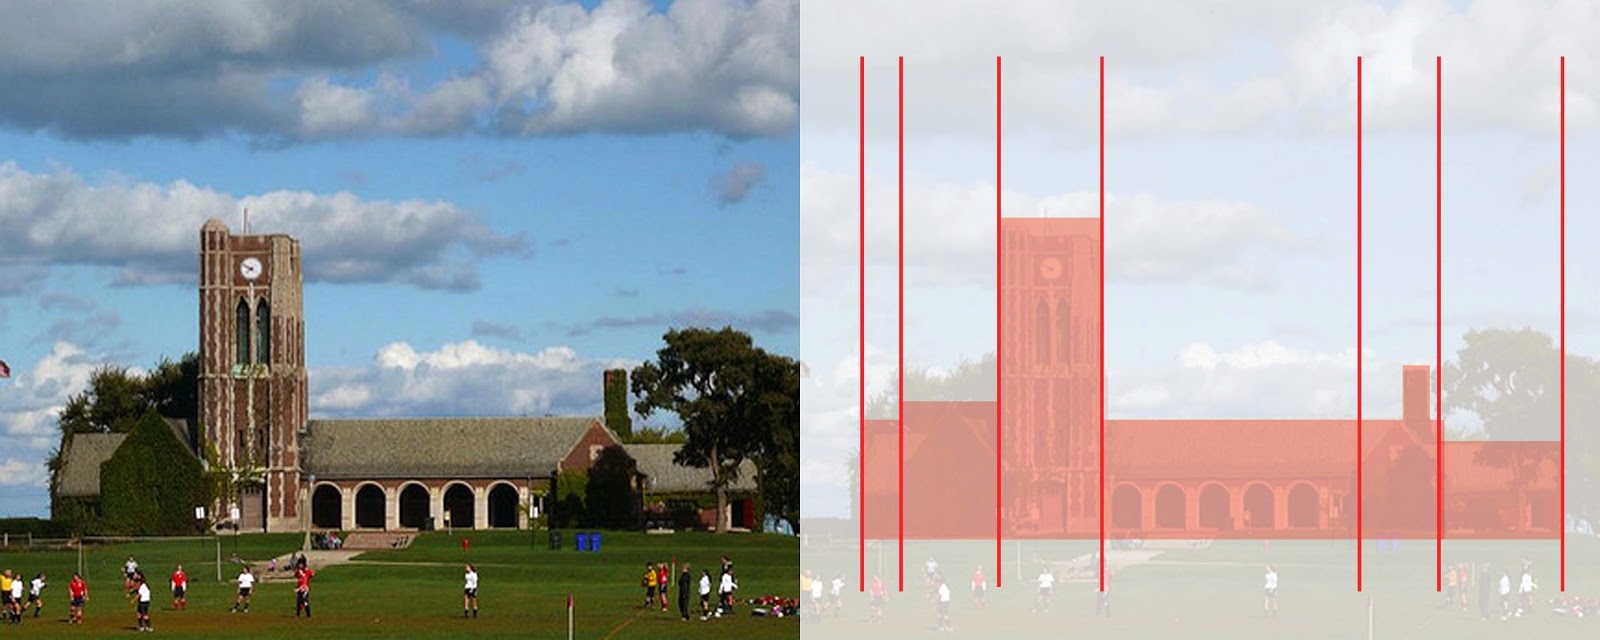
Mark out all the other large masses.  In this building there were essentially 6 large masses that comprised the entire elevation.  I sized each portion based on my measuring unit, the tower width.


The 8 tick marks I made on the length of the building helped as guidelines.  So for example, I sighted that the first mass (farthest left) was about ¾ of 1 tower width.  Since I have the tower width marked out, I was able to draw my vertical line for that portion of the wall at ¾ of the way through the first tick mark.  Repeat these steps for the rest of the masses.


5)
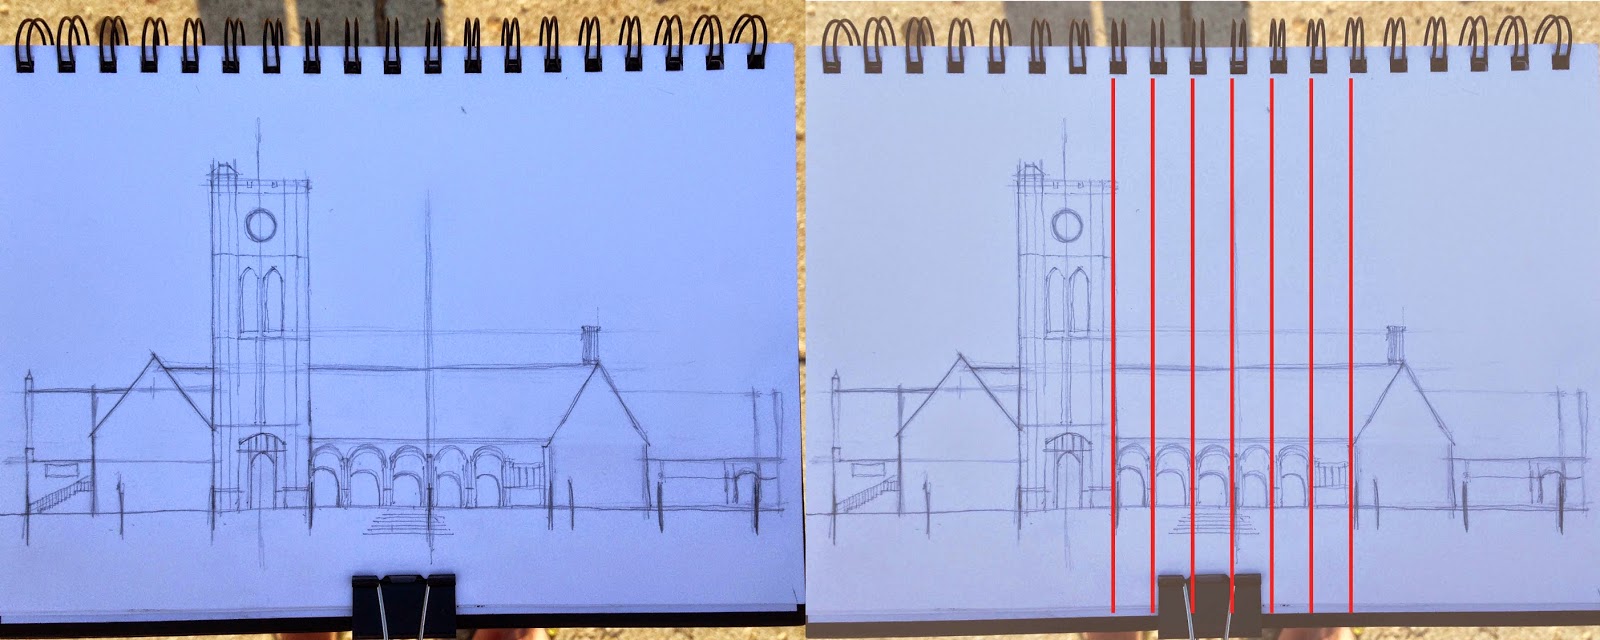
Now that you've marked out the largest masses of the building, move to the medium sized masses.  For me these were the arches, windows and doors.  The colonnade of arches is nicely divided into 6 uniform bays, so I was easily able to divide the middle portion of the building up into 6 equal parts.  Use this type of logic for the rest of the details.  (If your details are not evenly spaced, simply use a smaller architectural element as your measuring unit to determine the distances and proportions you need.)


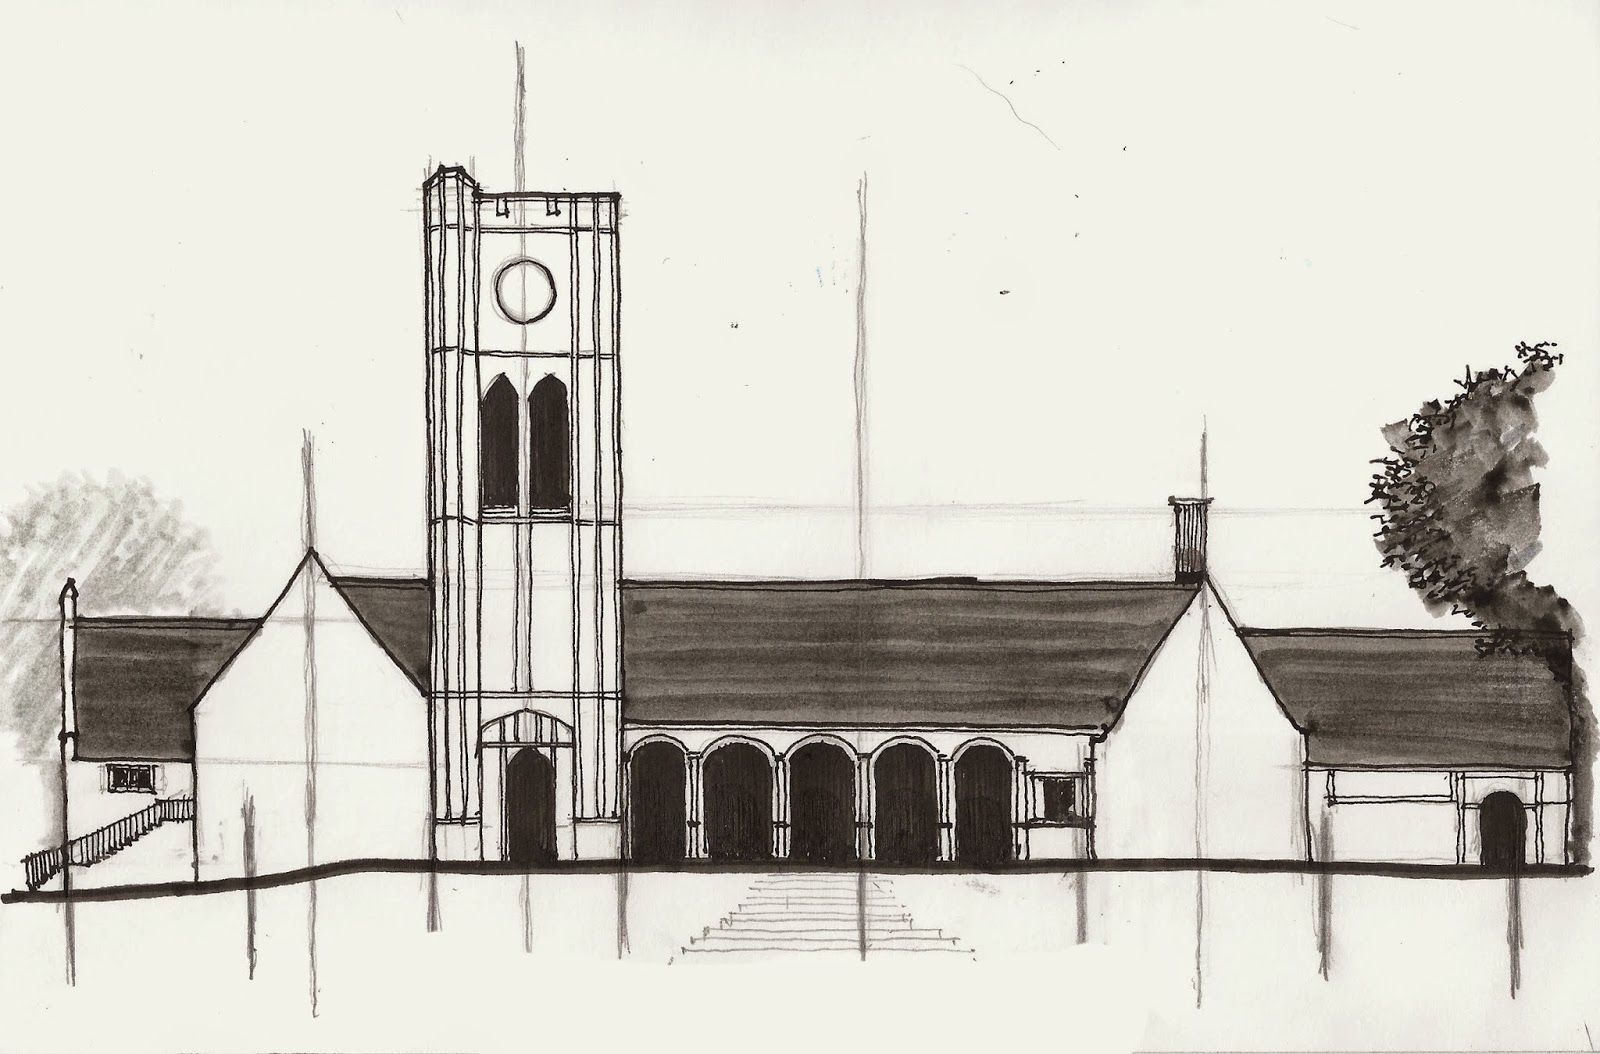
Now you can begin to add details, value, shading and shadows.


Once you feel comfortable sighting sizes and proportions on a building at a straightforward view, you will be ready to combine the techniques of perspective with those in this post.

I hope this is helpful!  As always, let me know if you have any questions!

-Andrew